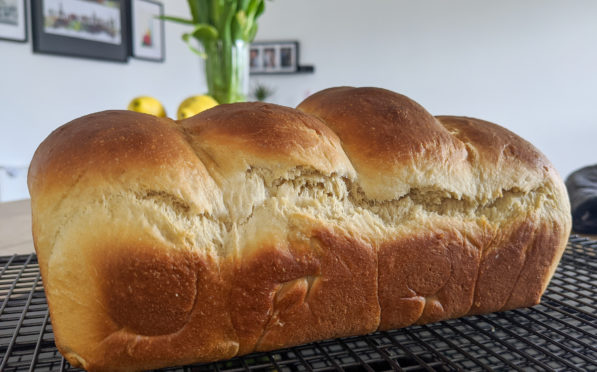
The fluffy, pillow-like Japanese milk loaf, Shokupan, is one of those iconic world breads and a breakfast staple in its home country.
For me it’s up there with a proper French baguette, a San-Francisco sourdough and the braided Challah, and is distinguished by its soft, springy texture and sweeter taste.
And with Paul Hollywood’s new series taking the bread king from Liverpool to Japan, the golden-hued loaf has jumped back into the limelight.
The Pan No Tora Bakery, which holds the record for the most freshly baked sandwich bread in 24 hours – an incredible 1559kg of the stuff, was heaven for Paul, with him describing it as a “revelation “.

Leaving the bakery he took with him one of their iconic loafs, describing it as looking “a bit like a brioche” and being “incredibly soft, feels like a fluffy cloud”.
The key to creating the pillowy soft texture of the Shokupan and it’s sweeter relative the Hokaido milk loaf starts with a mix of flour, water and milk called tangzhong.
The three ingredients are heated together over a low heat until it thickens to the consistency of a custard.
The other slightly unusual ingredient for this load – especially if you normally bake a standard loaf – is the milk powder.
The final step which will guarantee the perfect loaf is the folding and rolling before the final proving.
All together hands on time, this load will take about 20 minutes to make, with around two hours of proving in between and finishing with a 30 minute bake.
Japanese Shokupan
(Makes 1 loaf)
Ingredients
For the tangzhong:
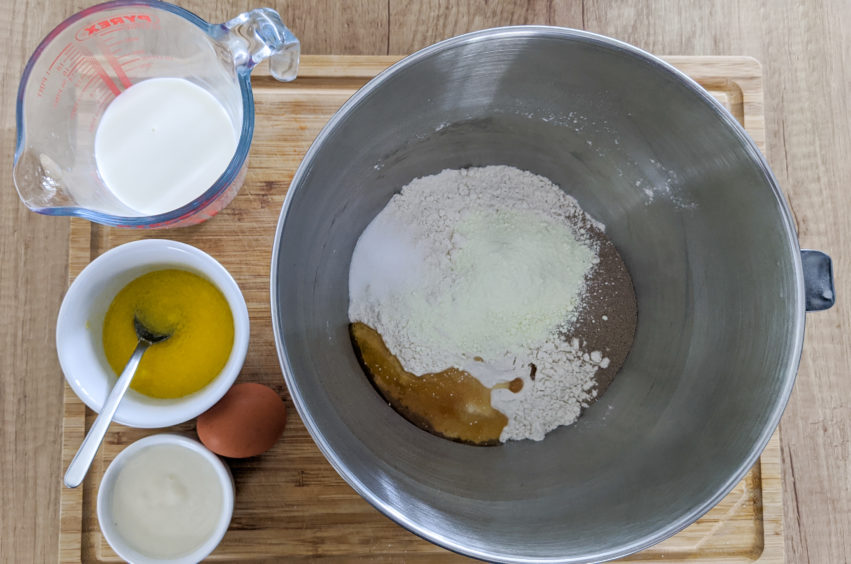
- 43ml full-fat milk
- 43ml water
- 14g strong bread flour
For the bread:
- 300g strong bread flour
- 20g runny honey
- 7g fast acting dried yeast
- 5g salt
- 14g skimmed milk powder (less than 1% fat)
- 1 large egg
- 50g unsalted butter (melted)
- 115g full-fat milk
Method
- For the tangzhong, mix together the flour, milk and water in a saucepan and place over a low heat. Whisk together to make sure there’s no lumps and cook out for around three minutes. The result will be a thick liquid. Pour this into a bowl and leave to cool to around room temperature.
- Mix together your dry ingredients in your mixing bowl, add the yeast and salt to separate sides. Make a small well in the middle and add your egg, milk, melted butter and tangzhong mix.
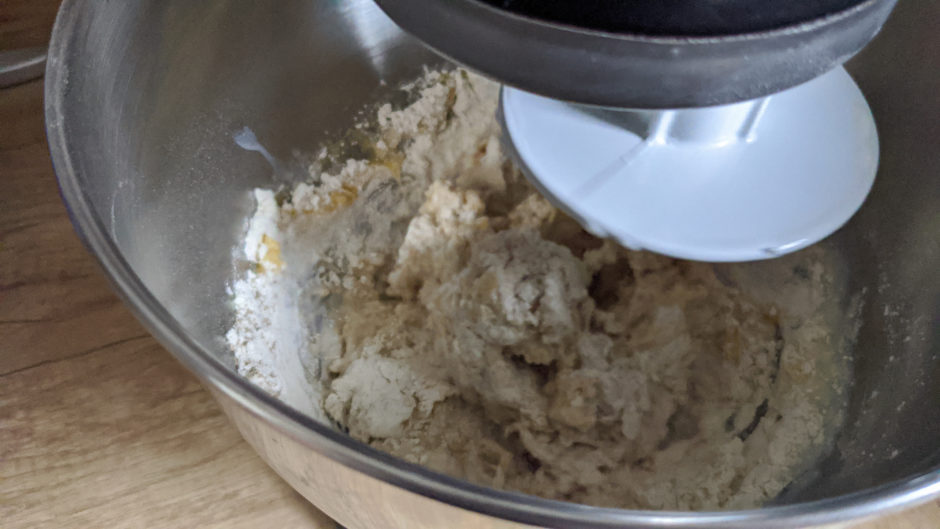
- Using a stand mixer with a doughhook, knead for around 10-15 minutes. It will seem very dry to start, but comes together to form a slightly sticky smooth dough.
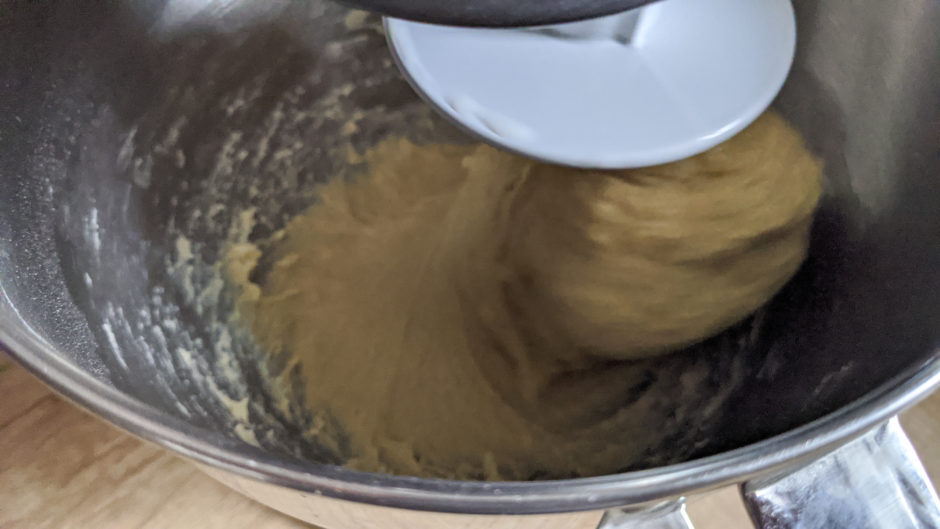
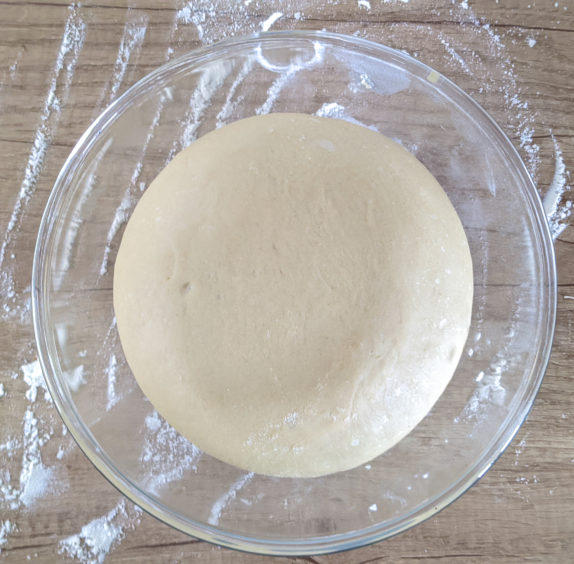
The mixture will come together as a smooth yet sticky dough - Remove the bowl and roughly shape into a ball before placing into a lightly-floured bowl. Cover with clingfilm or a damp towel for an hour to an hour and a half until puffed up and almost doubled in size.
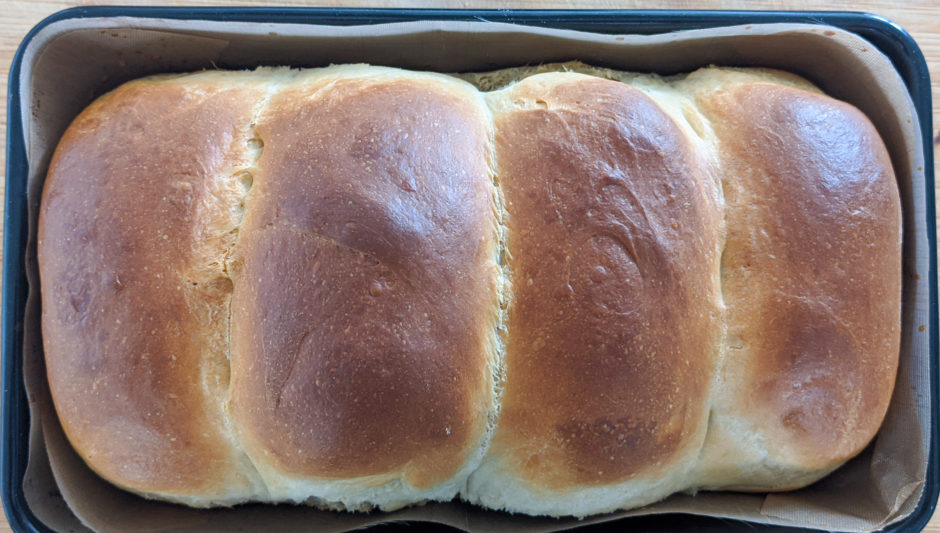
- Gently knock back (press down on) the dough and split into four equal pieces.
- Take your first piece and flatten out to a rectangle around 15cm x 10cm. Fold the one short end to the middle, before folding the other short end on top. This book-fold is exactly the same you’d use if making puff pastry or croissants.
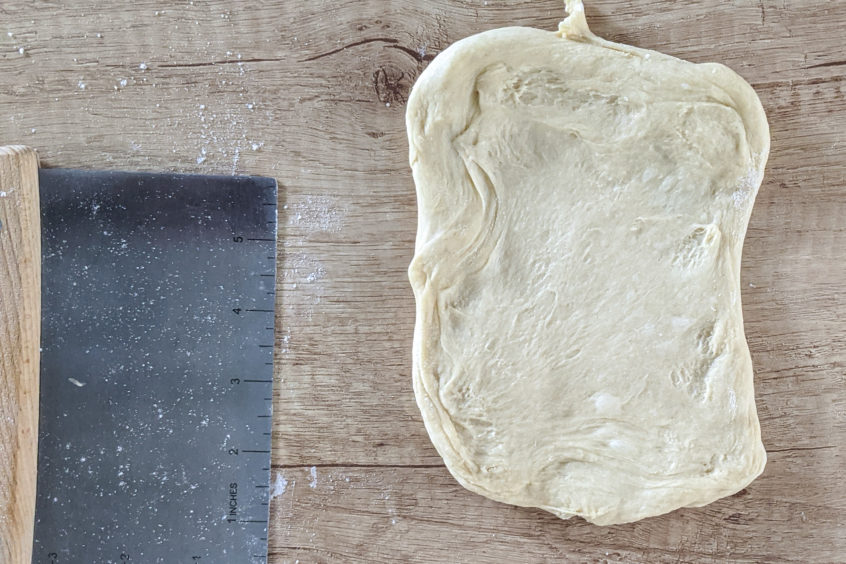
The dough split into four and flattened, ready to fold - Rotate your dough so the folds are running vertically away from you and gently flatten again into a rectangle around 8cm x 4cm. The short edge should be about the same width as your loaf tin. Carefully roll the dough up like a swiss roll and place in your tin.
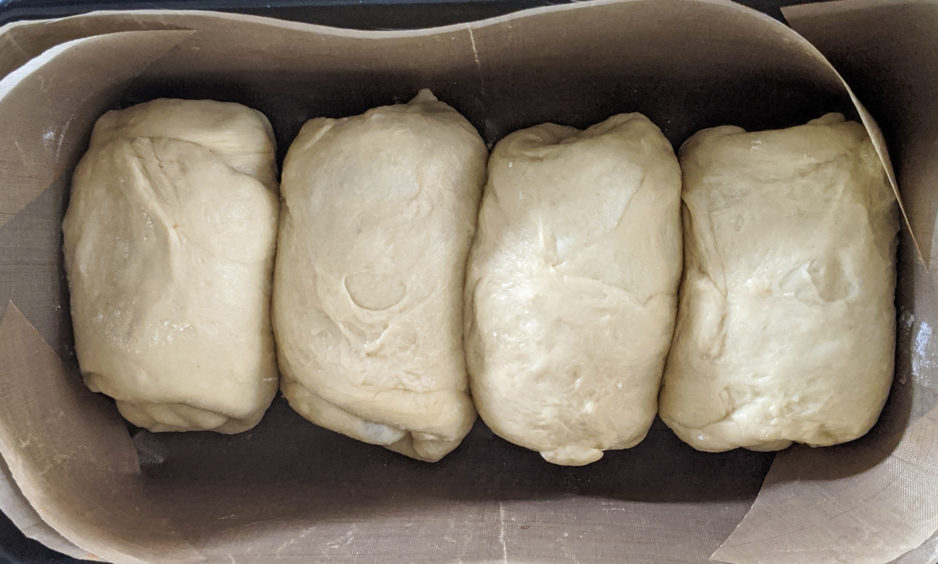
- Repeat the process above for the other three pieces of dough, adding them seam side down to your loaf tin.
- Cover again and leave to prove for around an hour. Pre-heat your oven to 175°C (160°C fan).
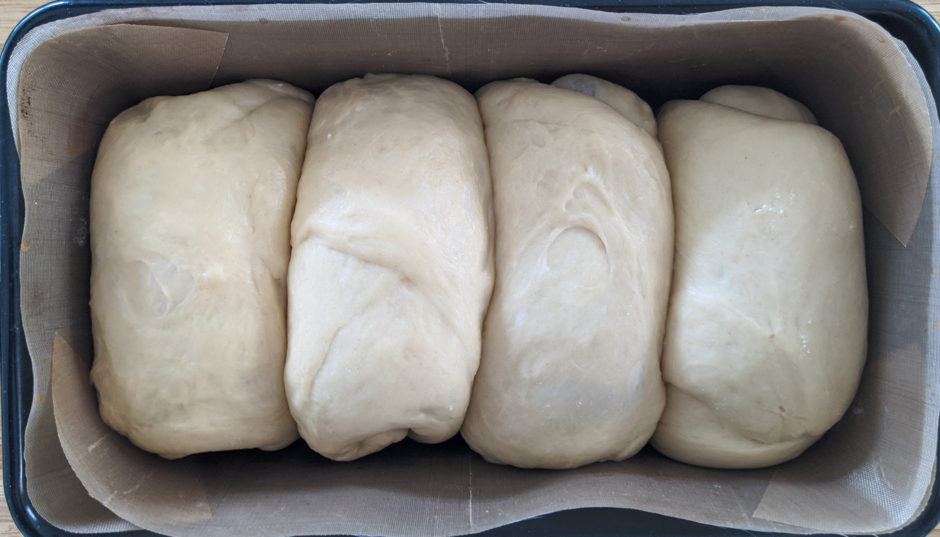
- Just before you place the loaf in the oven give the top a quick milk or egg wash – this will help you get that beautiful golden colour.
- Bake your loaf for 30 minutes. You will know it’s done by either tapping the base and hearing a hollow sound, or having a core temperature of 85c.
- Allow the loaf to cool in the tin for five minutes before removing and allowing to cool completely.