Calendar An icon of a desk calendar. Cancel An icon of a circle with a diagonal line across. Caret An icon of a block arrow pointing to the right. Email An icon of a paper envelope. Facebook An icon of the Facebook "f" mark. Google An icon of the Google "G" mark. Linked In An icon of the Linked In "in" mark. Logout An icon representing logout. Profile An icon that resembles human head and shoulders. Telephone An icon of a traditional telephone receiver. Tick An icon of a tick mark. Is Public An icon of a human eye and eyelashes. Is Not Public An icon of a human eye and eyelashes with a diagonal line through it. Pause Icon A two-lined pause icon for stopping interactions. Quote Mark A opening quote mark. Quote Mark A closing quote mark. Arrow An icon of an arrow. Folder An icon of a paper folder. Breaking An icon of an exclamation mark on a circular background. Camera An icon of a digital camera. Caret An icon of a caret arrow. Clock An icon of a clock face. Close An icon of the an X shape. Close Icon An icon used to represent where to interact to collapse or dismiss a component Comment An icon of a speech bubble. Comments An icon of a speech bubble, denoting user comments. Comments An icon of a speech bubble, denoting user comments. Ellipsis An icon of 3 horizontal dots. Envelope An icon of a paper envelope. Facebook An icon of a facebook f logo. Camera An icon of a digital camera. Home An icon of a house. Instagram An icon of the Instagram logo. LinkedIn An icon of the LinkedIn logo. Magnifying Glass An icon of a magnifying glass. Search Icon A magnifying glass icon that is used to represent the function of searching. Menu An icon of 3 horizontal lines. Hamburger Menu Icon An icon used to represent a collapsed menu. Next An icon of an arrow pointing to the right. Notice An explanation mark centred inside a circle. Previous An icon of an arrow pointing to the left. Rating An icon of a star. Tag An icon of a tag. Twitter An icon of the Twitter logo. Video Camera An icon of a video camera shape. Speech Bubble Icon A icon displaying a speech bubble WhatsApp An icon of the WhatsApp logo. Information An icon of an information logo. Plus A mathematical 'plus' symbol. Duration An icon indicating Time. Success Tick An icon of a green tick. Success Tick Timeout An icon of a greyed out success tick. Loading Spinner An icon of a loading spinner. Facebook Messenger An icon of the facebook messenger app logo. Facebook An icon of a facebook f logo. Facebook Messenger An icon of the Twitter app logo. LinkedIn An icon of the LinkedIn logo. WhatsApp Messenger An icon of the Whatsapp messenger app logo. Email An icon of an mail envelope. Copy link A decentered black square over a white square.

New dive pictures reveal wreck of World War I battleship HMS Vanguard in Scapa Flow

Divers inspect the bow of HMS Vanguard in Scapa Flow

These eerie pictures are the first glimpse in years of a wrecked World War I battleship lying in the depths of Scapa Flow.

HMS Vanguard exploded at anchor off Orkney on July 17, 1917, with the loss of 843 men. Only two survived.

Today, the wreck lies just off the north coast of Flotta in Scapa Flow at a depth of about 110ft.

The site is strictly controlled by the Protection of Military Remains Act and no diving is permitted except under licence from the Ministry of Defence.

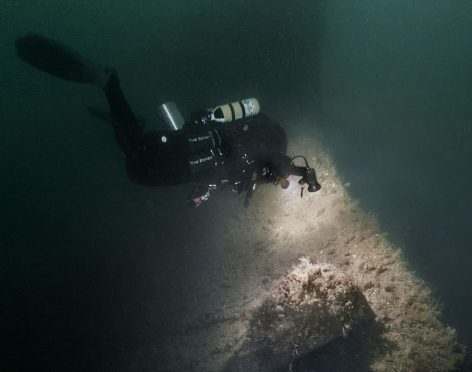
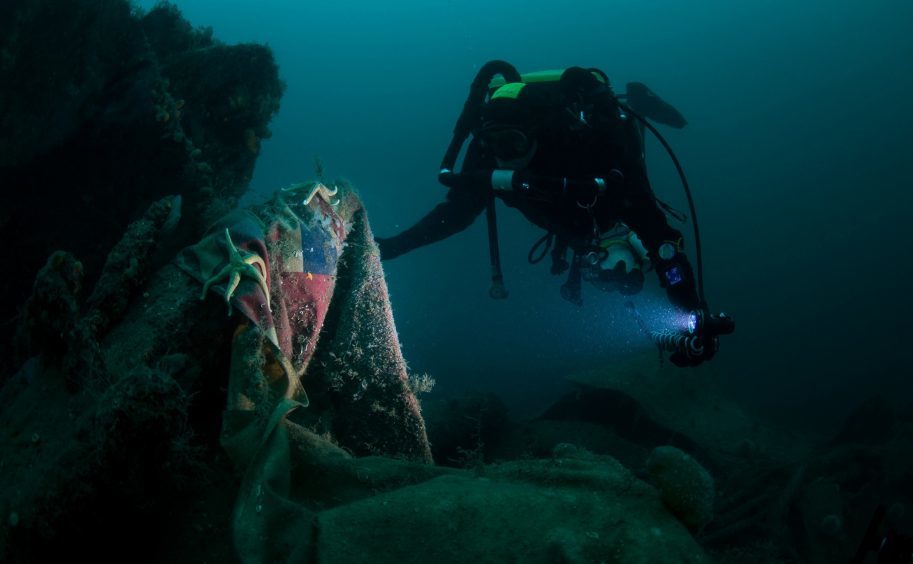
Now specialist divers from Orkney have been allowed to survey HMS Vanguard with the ultimate aim of making a full 3D recreation to assess the condition of the wreck.

The dive is being led by Ben Wade and Emily Turton of Orkney-based boat MV Huskyan.

Efforts to examine the site began in October this year and will continue into the spring.

The wider team includes specialists in munitions, weapons engineering, naval history, marine biology and underwater 3D visualisation.

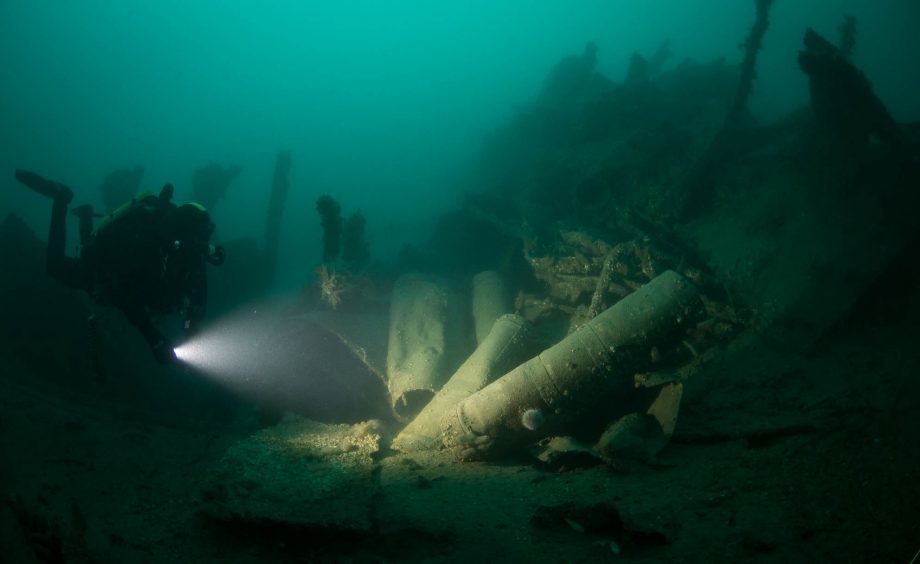
Ms Turton said initial findings supported the theory that the disaster was caused by an explosion in the ship’s magazine.

HMS Vanguard anchored in Scapa Flow, Orkney.
HMS Vanguard anchored in Scapa Flow.

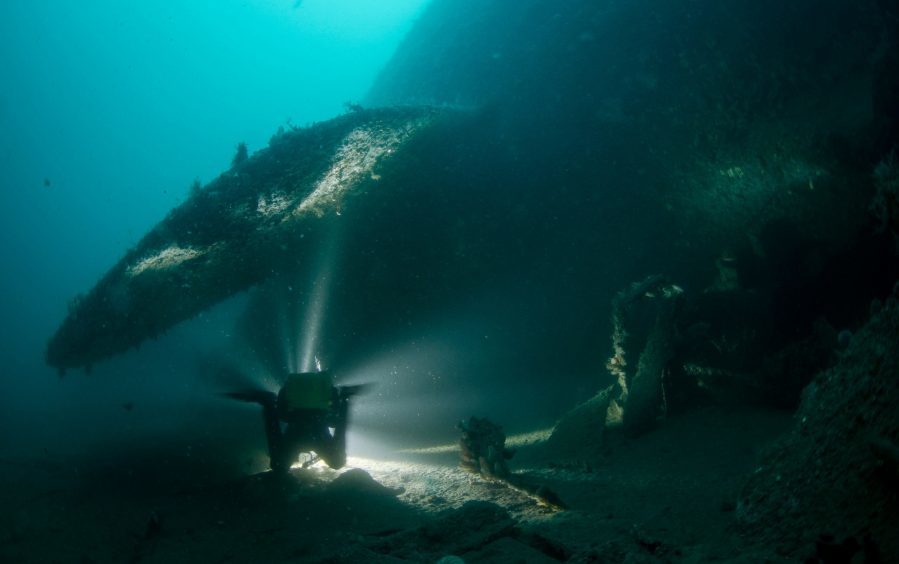
She said: “The main wreck is complicated with an extensive debris field.

“Surprisingly, given the nature of her loss, both the bow and stern are intact despite large pieces of wreckage having been thrown hundreds of metres away.

“HMS Vanguard was legally salvaged during the second half of the twentieth century and much of this evidence remains.

Findings support theory about cause of HMS Vanguard sinking

“It is accepted that the likely cause of the disaster was an accidental magazine explosion. Eye witness accounts on the night of her loss describe a large explosion immediately behind the bridge.

“We can reveal that our initial survey results support this.

“The latest explosion appears to have been in the P and Q turret magazines.

“Today there is little wreckage left in the area and both P and Q turrets have been displaced by approximately 40m (131ft).”

The findings from the survey will be used to tell the story of HMS Vanguard as the centenary of its sinking is marked later in the year.

Many of the divers involved were involved in similar efforts to study the wreck of HMS Hampshire last year.

The warship struck a German mine off Marwick Head with the loss of 737 men, including the secretary of state for war Lord Kitchener.