I love a long-distance walk, but too often, it ends in a bit of an anti-climax.
That final slog through, say, Fort William or the suburbs of Inverness. This, however, was very different. The Moray Coast Trail had saved the very best for last.
In fading daylight, we made our way along the beach towards the lights of Cullen. The breeze whipped the sea into a froth, and slate-grey skies grew even darker, while weirdly shaped fins of conglomerate rock rose out of the sand dunes. This was to be no anti-climax; this was a spectacular end to what had already been a remarkable trip.
My old pal Graham and I had left Forres three days earlier, in high spirits despite the bitterly cold temperatures. For Graham, this was a “comeback” walk after a long period of illness, so there was, perhaps, a little apprehension as well as anticipation. We’re not as young as we once were, but, hey, it was time for a wee adventure.
Roadside footpaths made for a speedy, if slightly dull, start. We soon reached the massive tidal basin of Findhorn Bay. Strings of geese made their way across the wintery skies. The cold made the air incredibly clear, and snow-capped mountains stretched into the distance.
As we reached the coast, our objective of Burghead was clearly visible ahead. We would later come to learn this isn’t always an advantage, as after a good hour of walking, it didn’t appear much closer.
The going was easy on the beach at first, but we retreated inland on to forest tracks to escape the rising tide and frozen shingle.
Our final approach to Burghead was along the beach, as the sun set behind us.
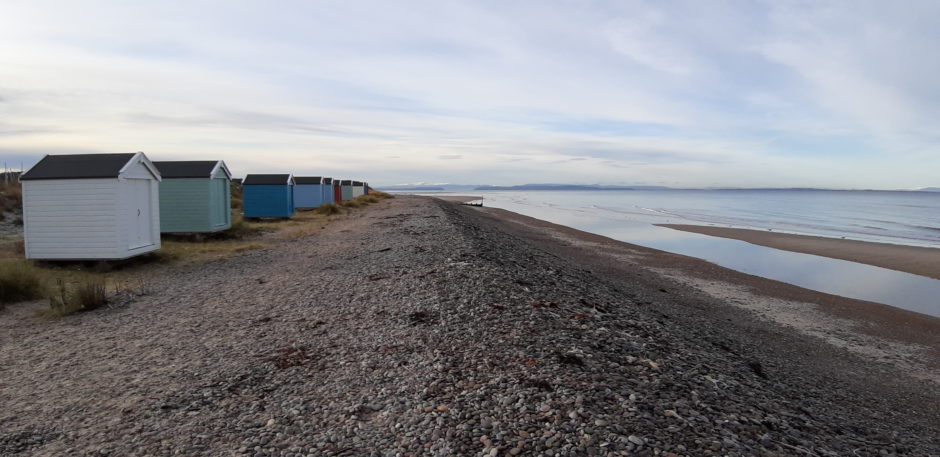
The next morning, we soon reached Hopeman, with its brightly painted beach huts. Then came the cliffs of Covesea, with secluded coves far below, before a fine stretch of easy beach walking past Covesea lighthouse, with Lossiemouth ahead.
The closure of the footbridge to Lossiemouth west beach added a couple of unwelcome miles to an already long afternoon. We had planned for it, though, and the signed diversion was clear enough, albeit with an unpleasant 20 minutes of road walking.
Regaining the coast, our route weaved between the massive concrete blocks of Second World War coastal defences on the landward side of a massive shingle bar, which screened any sea views but gave a rather other-worldly atmosphere. In truth, we enjoyed this section, with occasional forays up on to the shingle to take in the views before completing the final stretch through Kingston and into Garmouth.
Our final day started by crossing the Spey on the massive Garmouth viaduct, before turning back to the coast and the magnificent Spey Bay. Yet more shingle here, piled high and wide, and constantly rearranged by the river and tides. Spey Bay is a delight at any time of year, and a couple of seals popped up in the river mouth as we marvelled at the power of the elements to create such a place.
Tearing ourselves away, we headed inland, rejoining the coast at Portgordon, where colonies of seals bask on the inshore rocks.
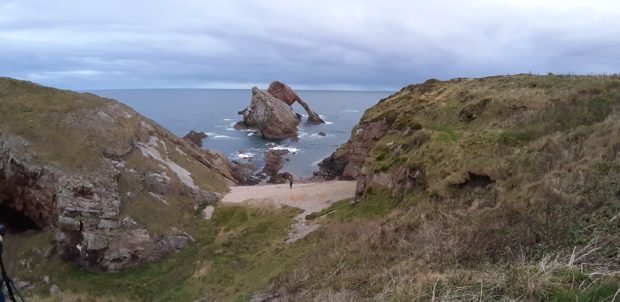
Then came the finale. We zigzagged over the rough sandstone cliffs to Findochty, followed by a fine promenade along the clifftop to Portknockie, with the setting sun lengthening our shadows. A few minutes later, we came upon the spectacular sea arch of Bow Fiddle rock, framed perfectly between two cliffs.
Finally we glimpsed the sands of Cullen Bay, glowing salmon-pink in the fading light. We descended through rocks blasted into bizarre shapes, with sea thrift clinging to the odd crevice, before finally emerging on to the last stretch along the beach, and the end of our journey.
Graham’s comeback was complete.
This is a landscape of broad, sweeping bays, of big seas and even bigger skies, which possesses a drama all of its own. The route is waymarked and navigation is easy (keep the sea on your left!) allowing time for a true appreciation of the richness of the surroundings, and for the mind to wander.
We were blessed with dry weather, and the colder, shorter days of late autumn served to keep us moving where we might otherwise have lingered. The going is largely easy, especially if the tides allow beach walking.
And the finish is sublime.
The walk
- Route: Moray Coast Trail from Forres to Cullen
- Distance: 45 miles
- Time: 3-4 days
- Difficulty: Easy walking on waymarked paths