Calendar An icon of a desk calendar. Cancel An icon of a circle with a diagonal line across. Caret An icon of a block arrow pointing to the right. Email An icon of a paper envelope. Facebook An icon of the Facebook "f" mark. Google An icon of the Google "G" mark. Linked In An icon of the Linked In "in" mark. Logout An icon representing logout. Profile An icon that resembles human head and shoulders. Telephone An icon of a traditional telephone receiver. Tick An icon of a tick mark. Is Public An icon of a human eye and eyelashes. Is Not Public An icon of a human eye and eyelashes with a diagonal line through it. Pause Icon A two-lined pause icon for stopping interactions. Quote Mark A opening quote mark. Quote Mark A closing quote mark. Arrow An icon of an arrow. Folder An icon of a paper folder. Breaking An icon of an exclamation mark on a circular background. Camera An icon of a digital camera. Caret An icon of a caret arrow. Clock An icon of a clock face. Close An icon of the an X shape. Close Icon An icon used to represent where to interact to collapse or dismiss a component Comment An icon of a speech bubble. Comments An icon of a speech bubble, denoting user comments. Comments An icon of a speech bubble, denoting user comments. Ellipsis An icon of 3 horizontal dots. Envelope An icon of a paper envelope. Facebook An icon of a facebook f logo. Camera An icon of a digital camera. Home An icon of a house. Instagram An icon of the Instagram logo. LinkedIn An icon of the LinkedIn logo. Magnifying Glass An icon of a magnifying glass. Search Icon A magnifying glass icon that is used to represent the function of searching. Menu An icon of 3 horizontal lines. Hamburger Menu Icon An icon used to represent a collapsed menu. Next An icon of an arrow pointing to the right. Notice An explanation mark centred inside a circle. Previous An icon of an arrow pointing to the left. Rating An icon of a star. Tag An icon of a tag. Twitter An icon of the Twitter logo. Video Camera An icon of a video camera shape. Speech Bubble Icon A icon displaying a speech bubble WhatsApp An icon of the WhatsApp logo. Information An icon of an information logo. Plus A mathematical 'plus' symbol. Duration An icon indicating Time. Success Tick An icon of a green tick. Success Tick Timeout An icon of a greyed out success tick. Loading Spinner An icon of a loading spinner. Facebook Messenger An icon of the facebook messenger app logo. Facebook An icon of a facebook f logo. Facebook Messenger An icon of the Twitter app logo. LinkedIn An icon of the LinkedIn logo. WhatsApp Messenger An icon of the Whatsapp messenger app logo. Email An icon of an mail envelope. Copy link A decentered black square over a white square.

Fraserburgh defeated 3-1 by Bonnyrigg Rose Athletic in play-off semi-final first leg

Fraserburgh's Scott Barbour, left, grapples with Bonnyrigg Rose Athletic's Bradley Barrett

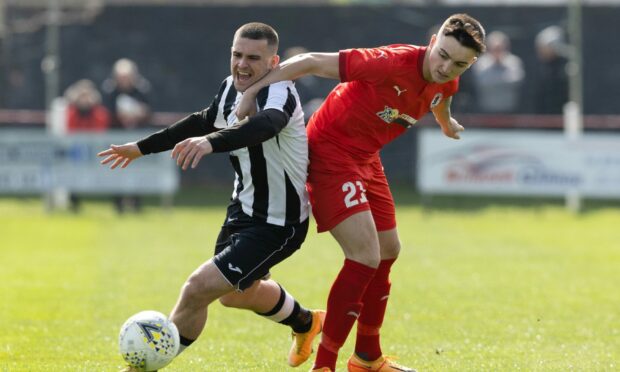
Fraserburgh will need to overturn a two-goal deficit against Bonnyrigg Rose Athletic at Bellslea if they are to reach the pyramid play-off final.

The Broch were defeated 3-1 by the Lowland League champions at New Dundas Park.

Keiran McGachie’s first half header gave the Rose a first half lead and Callum Connolly’s counter made it 2-0 early in the second half.

Paul Young pulled a goal back for the Breedon Highland League champions, but Lee Currie’s late free-kick gives Bonnyrigg a healthy advantage to take to Bellslea next Saturday for the second leg.

The winner of the tie will face League Two’s bottom side Cowdenbeath over two legs for a place in next season’s SPFL.

The visitors were backed by a 300-strong travelling support down from the north-east as around 1600 packed into New Dundas Park for this eagerly anticipated clash.

In a cagey first period the hosts enjoyed more of the ball but they didn’t create much with their possession.

Kerr Young sent a drive from long range swerving wide, but that aside Fraserburgh defended resolutely with goalkeeper Paul Leask seldom tested.

The Broch got into some good areas but also struggled to carve out decent chances with Scott Barbour’s tame shot wide their only effort at goal in the first 45 minutes.

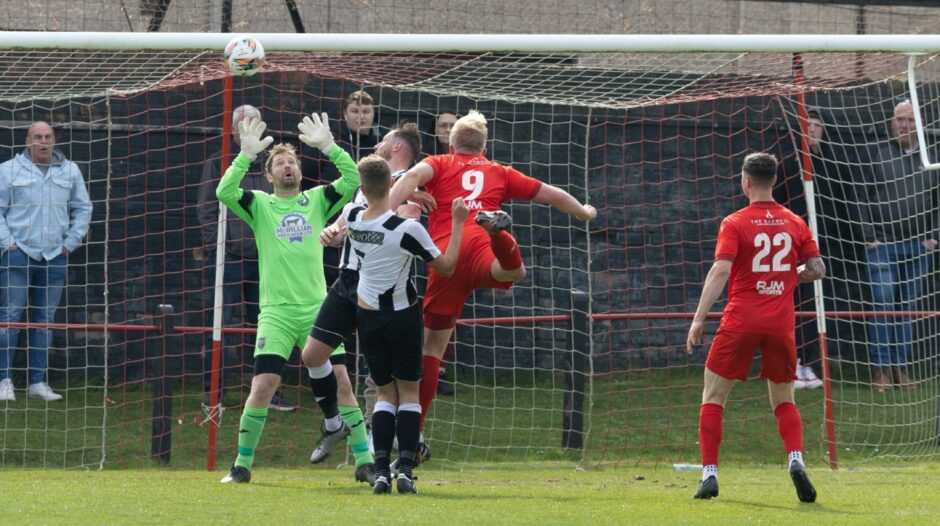
But seven minutes shy of half-time Bonnyrigg took the lead with Lee Currie curling in a free-kick from the right and McGachie rising highest at the back post to head home.

Hosts double their lead

The first opening after the interval with goalkeeper Mark Weir spilling a cross, but Grant Campbell sliced a shot wide from the edge of the area.

But in the 54th minute Rose doubled their advantage with McGachie nodding down a long punt forward and Connolly was perfectly positioned to rifle a terrific half-volley into the left corner from 20 yards.

Although a thoroughly impressive side, Bonnyrigg also showed during the contest that they are adept at the ‘dark arts’ of the game

After falling two behind Fraserburgh boss Cowie shuffled his pack with Ryan Sargent and Paul Campbell coming off the bench to replace Willie West and Lewis Duncan.

Keiran McGachie, number nine, heads Bonnyrigg Rose Athletic in front against Fraserburgh

And thee changes made a difference as the Broch pulled a goal back midway through the second half.

Ross Aitken’s cross was met by Paul Campbell at the near post, his header hit the crossbar and bounced down and Young rushed in to bundle the loose ball home.

Two minutes after scoring Fraserburgh went close again with Grant Campbell’s header from Barbour’s corner booted off the line.

However, after riding out the storm Bonnyrigg pounced to net a crucial third goal on 82 minutes.

Sub Sean Butcher fouled Dean Brett on the edge of the box and Currie curled a superb effort into the top left corner.

In the closing stages Ryan Cowie fired a free-kick over as Fraserburgh searched for a second goal.

With the last act Young made a crucial intervention to keep the score at 3-1 when he headed Young’s header from a Currie corner off the line.