Re-furbishing our wee rock garden is on my “to do” list.
Over the years, this or that plant dies out, some become rather dominant and before you know it, the whole thing has lost its attractiveness.
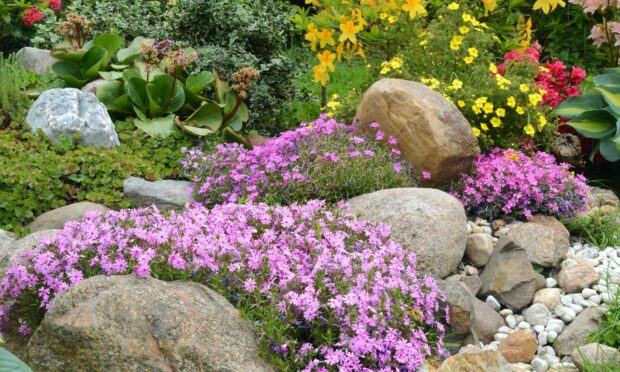
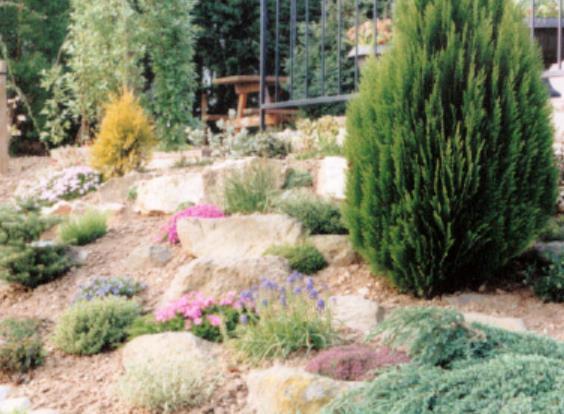
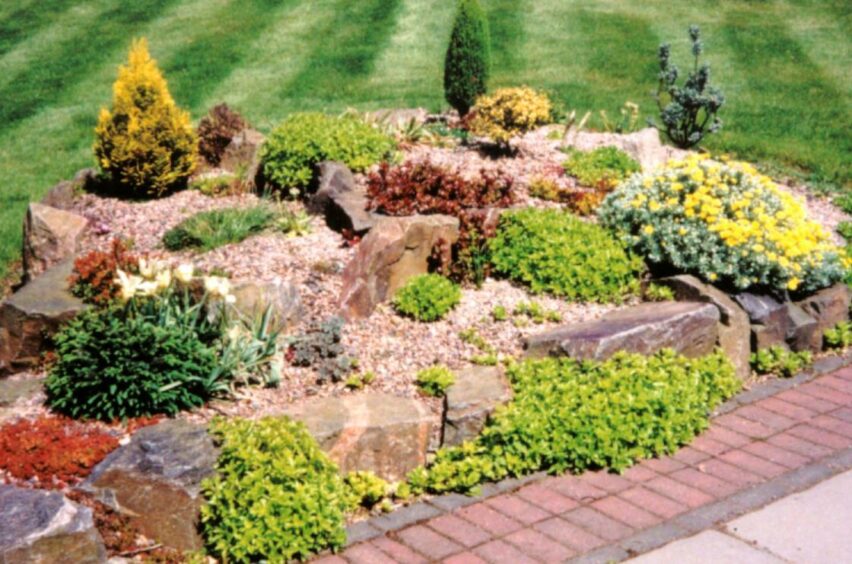
These thoughts are in my mind because we have a little border containing some rock plants and a couple of miniature conifers. Perhaps it doesn’t deserve to be called a rock garden, but it is my version!
It is situated on a bit of sloping ground facing our sitting room window and is beginning to look a little tatty, so it is going to get the works.
Wait a minute, I hear you ask, is this the right time to tackle the problem, because in particular some of the miniature bulbs are flowering now with others to flower in the coming weeks, so what’s to be done with them?
Answer – lift the clumps very carefully with a trowel and pop them into a pot just big enough to hold them together. You might even plunge the pot into a gap in the front of another border.
When flowering has finished, the clumps can be divided and planted back into the refurbished border.
Some of my other favourite plants in the present border which I want to keep will be lifted and moved to the cold frame, to be split up later and planted back.
When it is cleared of plants, I will be able to slacken up the soil and re-seat or even re-site a couple of rocks to change the profile slightly. This will allow me to add a bit more drainage material to the soil.
Changing climate
With climate change, there is a likelihood that we will have more rain and that means we are going to need to improve soil drainage at every opportunity, especially in a rock garden, because many of the most popular alpines don’t like wet feet.
Our soil is slightly heavy and therefore I will add in a few handfuls of well-rotted organic matter (really old compost) to help support good growth, but that’s not all, I am not an alpine specialist, nor am I looking for the challenge of growing “difficult” subjects, but even for the popular sorts I want to grow, like Alyssum, Thrift, Cyclamen, Campanula and Rock Rose, I need to ensure efficient drainage by working in some stone chippings (gravel).
How much? In simply improving what is already there I will add a 3cm layer of chippings and fork them in, to a depth of no more than 10cm. That will keep the soil texture open and mitigate against compaction and the very damaging “run off” which can occur during heavy rain.
Propagation
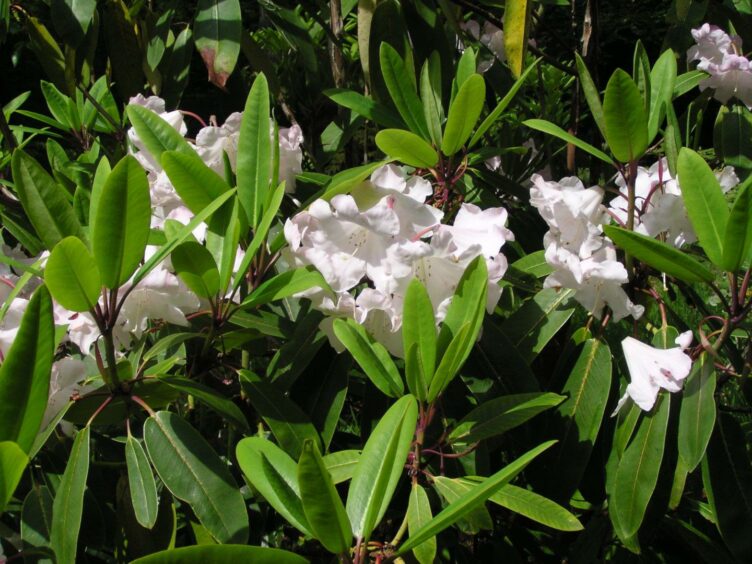
Another job on the list is a note to propagate one of my rhododendrons. I don’t need to rush out to do it tomorrow but sometime soon.
The technique is quite simple in that you do not need any special facilities. The method is called layering, and Rhoddies can be layered at this time when the sap is starting to rise.
Basically, you are looking for a young shoot which is arching towards the ground and beginning to turn upwards at or near the point where last year’s new growth could easily be pinned to the ground.
Cultivate the soil, adding a little gritty sand to improve drainage, then carefully remove a leaf, about 20cm from the tip and where the shoot can touch the ground. From the underside of the stem and with a sharp knife, cut a 3cm long slit up through a leaf joint, taking care not to sever the shoot from the parent branch.
Treat the cut surfaces with rooting hormone powder and then peg the shoot down into the prepared soil with a piece of wire, at the same time staking the shoot upright which ensures that the cut remains open.
Once secured to the stake, carefully cover the compost-laced soil gently over the cut area and firm carefully. Be sure that the layer doesn’t dry out at any time during the ensuing summer and you might even have it rooted by the autumn.
Having severed the new plant from its parent whilst still in situ, don’t be in a rush to move it. Assuming that the new individual is looking healthy, the following spring (year two), leave the new plant undisturbed to fully establish itself.
I’ve known situations when, from the outset, the young shoot is layered into a decent-sized pot which is filled with compost. The pot is buried to the rim in situ and the process carried just as described.
The following spring, the new plant, in its own pot, can be lifted carefully to be moved away to grow on elsewhere – or offered as a gift.