Get the grown-ups involved and try these cute Easter baking ideas.
In Kids’ Kitchen this week we’re sharing two super recipes that are fun for all the family to make – so make sure the grown-ups get involved too.
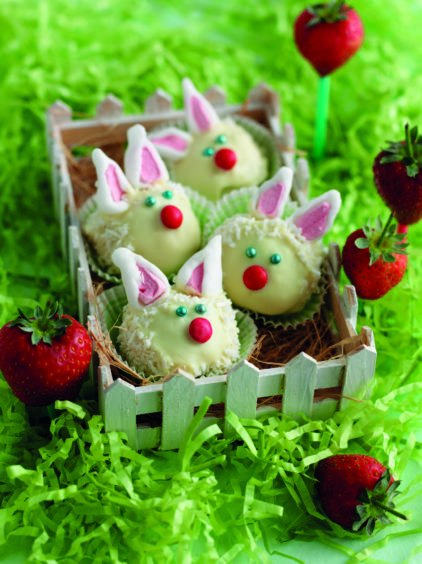
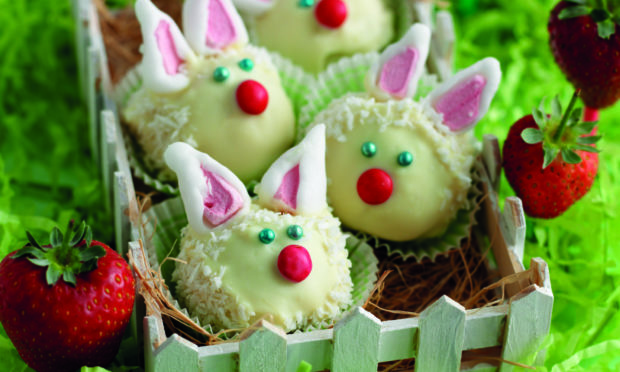
The Easter bunnies look incredibly cute and involve no baking, but possibly lots of sticky hands!
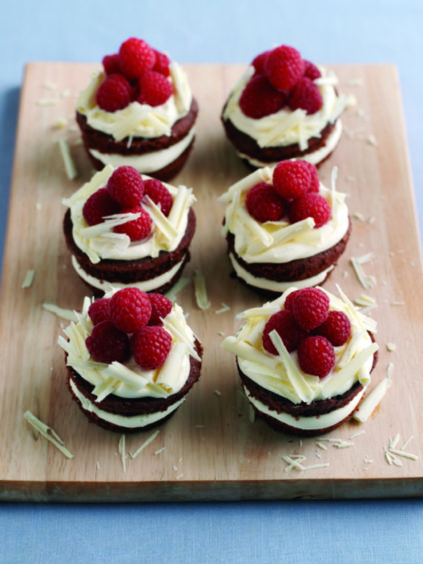
Our recipe for mini raspberry and chocolate nests are perfect for a real teatime treat – just the thing to enjoy after an Easter Sunday stroll with the family.
Recipes courtesy of lovefreshberries.co.uk
Mini raspberry and chocolate nests
(Makes 12)

Ingredients
- A little oil for greasing
- 25g cocoa
- 3 tbsp boiling water
- 175g soft margarine
- 175g caster sugar
- 150g self-raising flour
- ½ tsp baking powder
- 3 eggs
To finish:
- 300ml double cream
- 100g white chocolate curls
- 255g raspberries
Method
- Preheat the oven to 180C/160C fan/350F/gas mark 4.
- Lightly brush the insides of a 12 section deep muffin tin with a little oil and line the base of each one with a circle of greaseproof or non-stick baking paper.
- Put the cocoa into a small bowl, mix in the boiling water until a smooth paste is formed, then leave to cool.
- Put the margarine, sugar, flour and baking powder into a mixing bowl, add the cocoa paste and the eggs and beat until smooth. Divide the mixture evenly between the sections of the muffin tin, smooth the tops level, then bake for 12-15 minutes until well-risen and the tops spring back when lightly pressed with a fingertip.
- Leave for five minutes then loosen the edges with a knife, turn out on to a cooling rack and peel off the paper.
- Whip the cream in the rinsed and dried mixing bowl until it forms soft swirls.
- Split the cakes in half then sandwich back together with cream, spreading the remainder on top.
- Arrange the raspberries in the centre of each cake then sprinkle the chocolate curls around the edge to make a nest.
- Arrange on a plate to serve.
- To make chocolate curls: Unwrap a block of white chocolate and turn over so the underside is uppermost on a chopping board.
- Run a swivel bladed vegetable peeler along the edge to make curls. If the curls are very tiny, put the chocolate on a plate and microwave on full power for 10 seconds to soften the chocolate then try again.
Easter bunnies
(Makes 18)

Ingredients
- 285g pack Madeira cake
- 100g cream cheese
- ½ tsp vanilla paste or extract
- 100g strawberries, hulled
- 250g good quality white chocolate, broken into pieces
- 6 tbsp desiccated coconut or grated white chocolate
- 100g white ready-to-roll icing
- 18 pink mini marshmallows
- 18 mini red sugar coated sweets (mini Smarties)
- 36 mini blue edible sugar balls
Method
- Thinly trim the dark brown edges from the Madeira cake then make into crumbs by cutting into pieces and blitzing in a food processor or liquidiser or by crumbling into tiny pieces with fingertips.
- Beat the cream cheese and vanilla in a bowl until smooth.
- Finely chop the strawberries and add to the cream cheese with the cake crumbs. Mix together.
- Divide the cake mixture into 18 even-sized mounds and roll into balls. Put on to a baking sheet and freeze for 15 minutes.
- Break the chocolate into pieces and melt in a bowl set over a saucepan of gently simmering water, making sure that the water doesn’t touch the base of the bowl, for about five minutes.
- Stir the chocolate until smooth and take the bowl off the heat.
- Line a baking sheet with non-stick baking paper.
- Spear one of the cake balls on a fork then either swirl into the melted chocolate to coat or, using a teaspoon, spoon a little melted chocolate over the cake ball as it is held over the bowl, allowing the excess chocolate to drip off.
- Transfer the coated cake ball to the baking sheet and sprinkle half the ball with a little coconut or grated chocolate ‘“fur”.
- Continue coating the remaining cake balls in chocolate and sprinkling with coconut or grated chocolate until they are all done.
- To make the ears, cut the mini marshmallows in half and break off tiny pieces of white icing.
- Roll into balls and press into ovals a little larger than the marshmallows with fingertips dusted with icing sugar.
- Press the icing around a marshmallow and pinch the top into an ear shape.
- Press two on to each cake ball.Add sweets for eyes and noses.
- Chill in the fridge for one hour until set, then arrange in paper cake cases.
