It is amazing how quickly the compost bin fills up at this time of the year.
Fortunately, as I have mentioned before, I have a Hotbin and by jingo it is “hot” at the moment.
The bin sits on a few blocks, raising it about 30cm above ground level, and there is a reason for that which I will come to in a minute. My point is, the lid opens at my head height and when I open up to put some garden waste in, I am blasted in the face by the heat that escapes.
Even after a few days, the compost level will have sunk appreciably, which is good news, but let me first explain the point about it being raised. The Hotbin is fitted with a removable flap at the bottom of the front side so that you can readily remove composted material, even as you add in fresh stuff at the top. To be able to slip a container under that opening with some ease, that is why the whole bin is raised.
Back to filling the bin, it is a continuous process at this time of year – weeds, grass clippings and soft prunings like side shoots and lower leaves from tomatoes, cucumbers, etc, BUT, never too much of any one thing at a time.
The process works more efficiently when there is a mixture and it is one of these elements that has led me to this introduction. The question is often asked – can you add diseased material to the compost bin and the traditional answer is a definite no. However, I am tempted to suggest that in some instances it could now be a “maybe”.
That bin of mine closes quite tightly, the escape of heat when opened suddenly is proof of that, and therefore I am tempted to say that some diseased or otherwise damaged material might be destroyed by the heat and lack of air movement.
Leaf blister aphid
What brought this on, I hear you ask? My redcurrant bushes have been attacked by the leaf blister aphid. The name explains the problem – if you grow redcurrants, about this time of year, you may notice some maturing leaves crinkle up with blisters which gradually turn red.
The culprit is a little yellow aphid which sucks the leaf sap from underneath, hence you are not likely to be aware of the problem until the symptoms become obvious.
What’s to be done? Oddly enough, you needn’t do anything. These little aphids usually take off about now to other plants, such as hedges, to lay their eggs, thus completing their life cycle.
The damage to your redcurrant bushes is superficial, it does not influence the berry crop.
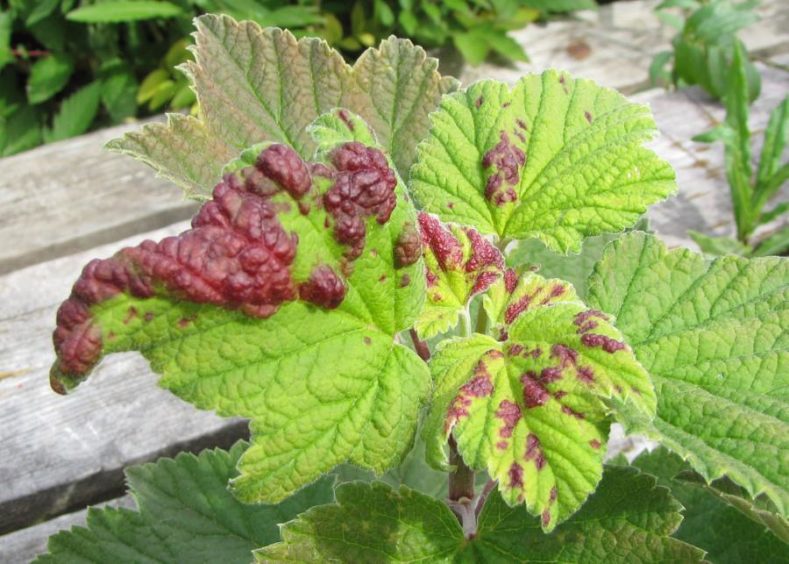
If it bothers you, as it does me, there is a cosmetic solution which does not harm the plants, nor does it affect future performance. I prune back the shoots to a leaf joint below the damaged foliage.
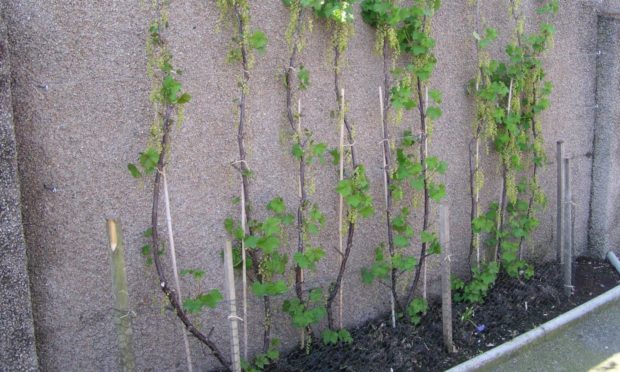
My redcurrant plants are trained as upright cordons, in other words, each plant was pruned about 15cm above ground level, cutting off the leading shoot. From that, two shoots were allowed to grow and trained as parallel perpendicular stems, about 30cm apart supported by wires.
Some people grow them in this fashion on a trellis or even against a wall. You can do the same with gooseberries, it is a technique which is particularly useful where space is limited. Coincidentally therefore, at this time of year, I remove the tip growths of all the sides shoots back to about 10cm from the main stem, in the process, this directs the energy of the plant into the developing fruits. In other words, summer pruning will remove that insect foliage damage.
You will know where I am going now. What’s to be done with the damaged prunings?
For the last year or two, I have despatched them to the Hotbin with no subsequent problems.
Dead-heading
Still on the same theme, which is an essential part of summer gardening – that is dead-heading the flowering plants which adorn the borders, including the bedding plants in borders, tubs and baskets.
It is a job like cutting the grass, best done regularly As gardeners come to realise, removing dead, dying or damaged bits is not just to tidy them. In many cases it will encourage the development of another flush of growth and flowering, but crucially, there is a hygienic element too. Dead, withered and damaged flowers and foliage may spread to clean healthy plants, the bonus being that many of the plants will be stimulated by the “pruning” element to go on to produce fresh flowering growth.
Vegetable garden
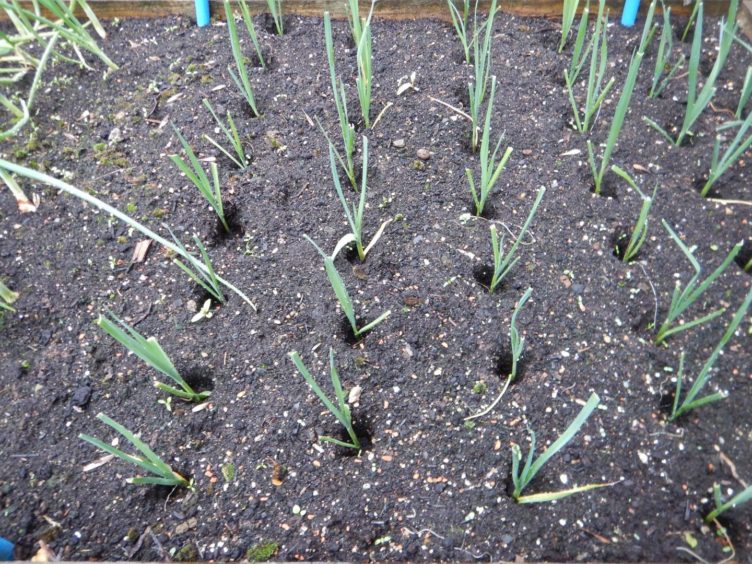
Planting in the vegetable garden continues too, successional salads for a start, but I have also just planted a few more leeks which were “topped and tailed” in preparation for planting, and that puzzled a relative who “caught me in the act”.
I have carried out his procedure since I started gardening for myself, having watched my grandfather and then my dad do it. It certainly makes the planting job easier and I continue to have decent crops.
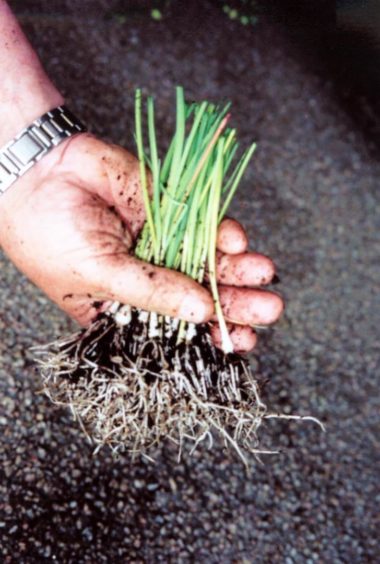
Firstly, whether I have started from scratch myself or more usually bought in a batch of young plants, holding a bunch in one hand, I clip the roots back to about 2-3cm long. Still holding the bunch, having turned it round, I clip the leaf ends, creating stalks of top growth about 20cm long.
I think you will realise already that this process will make it much easier to separate plants out when it comes to planting.
With wooden dibber (made from an old wooden spade handle) in one hand to poke a hole in the prepared ground about 10cm deep, you can drop a plant into the hole with the other hand.
When the job is done, each hole is then filled with water, which not only settles the roots into the bottom but it carries sufficient soil down to cover them. Otherwise, the hole is left open.
Stand back then and watch them grow!