
Previously unpublished photos of the final glory days of Aberdeen’s trams have been revealed in a nostalgic new book for the first time.
In July 1956, brothers David and John Clarke visited Aberdeen and photographed the city’s remaining tramways.
Now, for the first time, the unseen collection offers rare glimpses of Aberdeen’s lost trams, before the last lines closed.
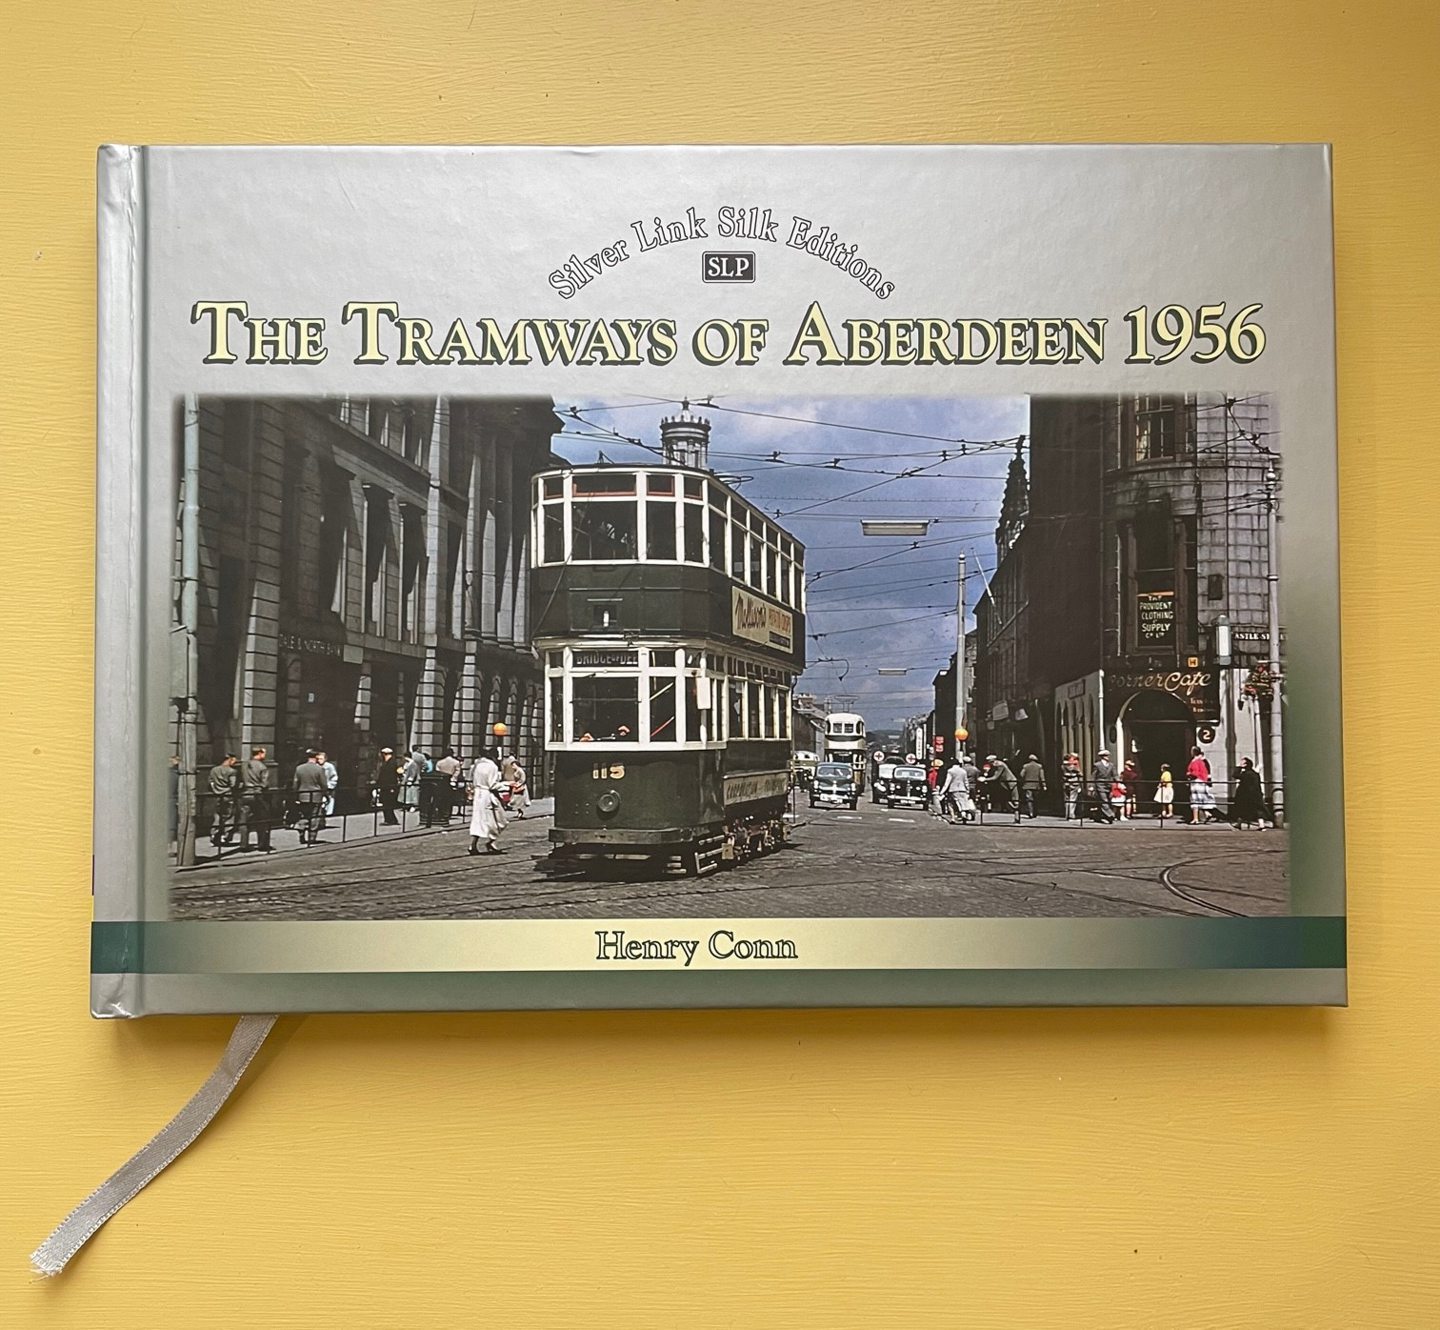
The book – The Tramways of Aberdeen 1956 – also offers an insight into life in post-war Aberdeen.
The advent of Aberdeen’s trams
Aberdeen Corporation tramways opened on August 26 1898 taking over from Aberdeen Tramways, which operated horse-drawn trams from 1874.
It took just four months from the breaking of the ground to the opening of the network on August 31 1874.
The total length of the line then was three miles for running six tramcars, pulled by a fleet of 24 horses.
The first routes ran between North Church on King Street (now the Arts Centre) and Queen’s Cross, and from St Nicholas Street to Causewayend.
When the tramways were transferred to the Corporation in 1898, they moved into the new century powered by electricity rather than horses.
But only just; the procession to celebrate the electrification of the Woodside line took place on December 23 1899.
The remaining horse-drawn lines were converted over the next two years, and new lines were opened to the beach, Ferryhill and Torry.
Corporation’s own buses competed with its trams
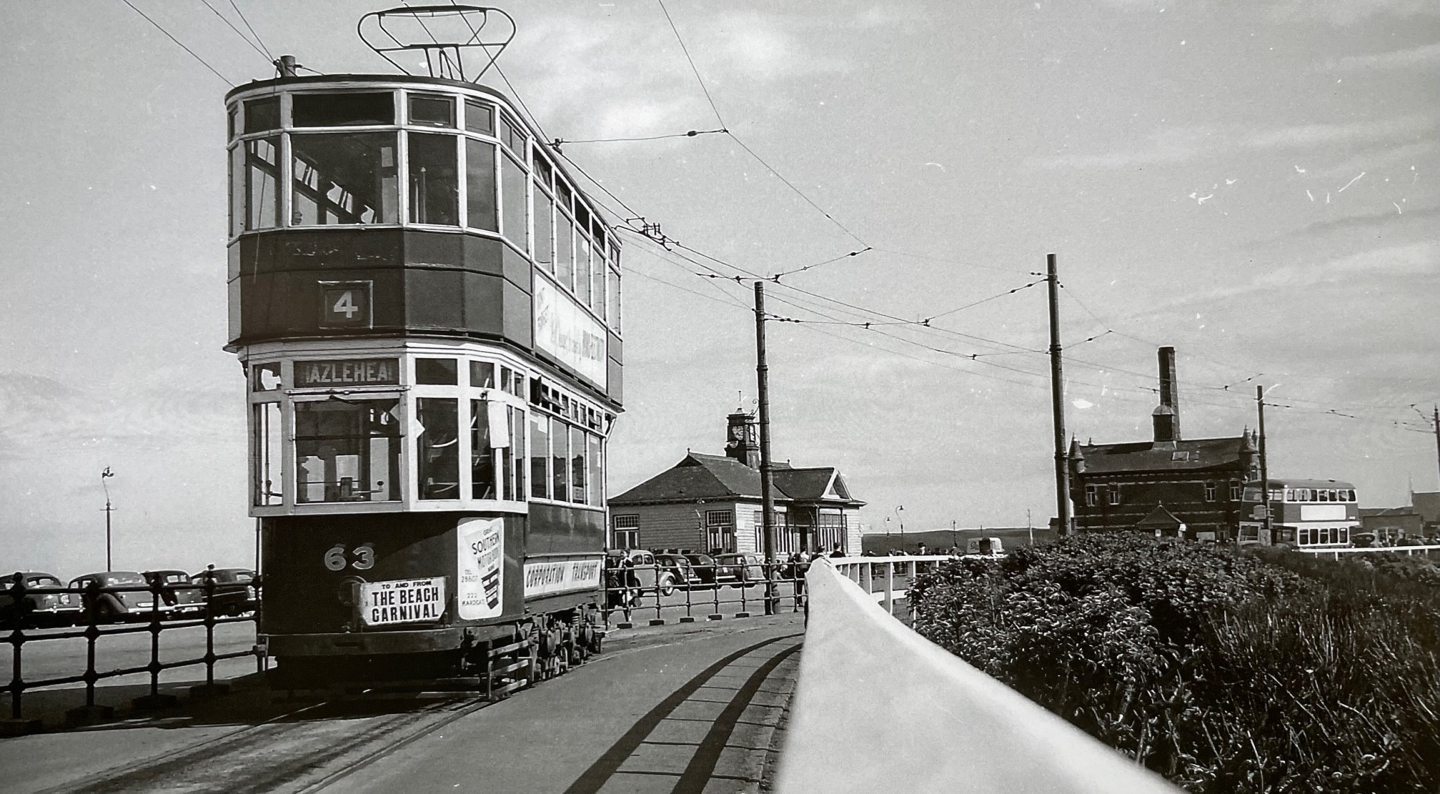
Into the 20th Century, the final extension was made to the network with a section of reserved track and a terminus at Hazlehead in 1924.
It would be a busy stop for pleasure-seekers heading to the park and the Royal Highland Show field.
But within seven years, the first closures crept into Aberdeen Tramways’ network.
The Torry route – a tram which weaved its way from Bridge Street through the congested Guild Street and quays until its terminus on Victoria Road – experienced great competition from new diesel buses.
Buses could better serve the wider Torry community, and the line was considered obsolete.
In fact the corporation’s own buses were competing with its own trams across the network.
The last tram ran on a bitterly cold February 28 in 1931 while a blizzard cut through the awaiting crowds.

Clarke brothers’ whistle-stop tour to take photos of Aberdeen’s trams
By the time David and John Clarke made their way to Aberdeen for their whistle-stop tram tour in 1956, only two routes remained.
The Bridges route linking Bridge of Dee and Bridge of Don, and the Beach/Castle Street to Woodend/Hazlehead line had clung on.
Perhaps sensing the end was nigh, the brothers had the foresight to photograph these tramways in great detail.
Without their photos, many memories of the trams would have been lost among the sands of time.
Now, author Henry Conn has carefully curated images from the Clarke brothers which he says are “rare, evocative and unpublished views”.

Along with unseen images from the collection of Michael Stephen, Henry has brought the magic of the city’s trams back to life in his book.
He added: “I most sincerely thank David and John for access to their rare and wonderful collection of negatives and slides, and to Mortons the publishers.”
Henry was also grateful for special access to the Aberdeen University archives.
Inspector’s insight into life in Aberdeen in 1956
The inspector’s notes in the book not only give a detailed account of the numbers of trams in use and the weather conditions, but also the social lives of Aberdonians in 1956.
Beginning in January 1956, the excerpts from the diary span the whole year, giving context to the photos.
Aberdeen’s night life was alive and kicking with events on every night in the 1950s.
From dancing at the Beach Ballroom and football at Pittodrie, to greyhound racing and visiting hour at Woodend Hospital – people needed transport.
The inspector meticulously recorded attendances at these events; thus informing decisions on how many trams were needed on the network at any one time.
Pittodrie and the greyhound racing were serviced by the number 1 Bridges route, which took passengers along King Street, Union Street and Holburn Street.
Its legacy lives on in the number 1 bus route which still links Bridge of Don and Garthdee today.
On January 3 1956, Aberdeen Football Club’s first team played Stirling Albion in front of a crowd of 25,000.
It was noted: “There was very heavy traffic before the match with seven extra trams required, and for the finish seven extra trams ran.”
He also adds that Aberdeen won 7-0 with Johnny Allen scoring four.
Extra trams for football at Pittodrie
When Aberdeen played Celtic four days later, 11 trams were needed for “very heavy loadings”. While two extra trams were needed for the greyhound racing where 750 people attended.
Heavy snow arrived that night, and sand lorries were deployed to help trams get traction on slippery rails.
Three sand lorries continued throughout the night supported by two tram ploughs and two salt cars, overseen by five inspectors.
Poor weather continued from January into February, with poor attendances at the ballroom.
The inspector wrote down incidences such as heavy snow leading to a broken wire on Holburn Street – but remarkably this was repaired within the hour and services resumed.
As snow thawed, passengers increased; February 11 was a particularly busy day on the network.
Two extra trams were needed from Castle Street for Sunday visiting at Woodend Hospital on the number 4 route.
While 13 buses and 12 trams were required for Aberdeen’s home game against St Mirren watched by a crowd of 15,000.
A nostalgic look back at life in the 1950s
Occasional collisions are also recorded, such as a horse being killed at the Regent Walk junction on King Street.
The inspector included operational information like points jamming, short circuits, and the fire brigade being called to cable fires.
In March 1956, fares also increased. It became 2d to travel two stages instead of three.
As the weather improved, the Hazlehead line became busier, particularly over Easter weekend and the Spring holiday.
The extracts chosen by the author, Henry, give a fascinating snapshot into life in Aberdeen in the late ’50s.
Council elections took place on May 1, and the following day was the Aberdeen schools’ football finals at Pittodrie.
Cummings Park and St Clement Street were the primary school finalists.
While Hilton and Kaimhill went head-to-head in the secondary final.
Even little social snippets are included – “this was the first day of the Co-op dividend”, undoubtedly busy, as it was when shoppers received an annual loyalty bonus.
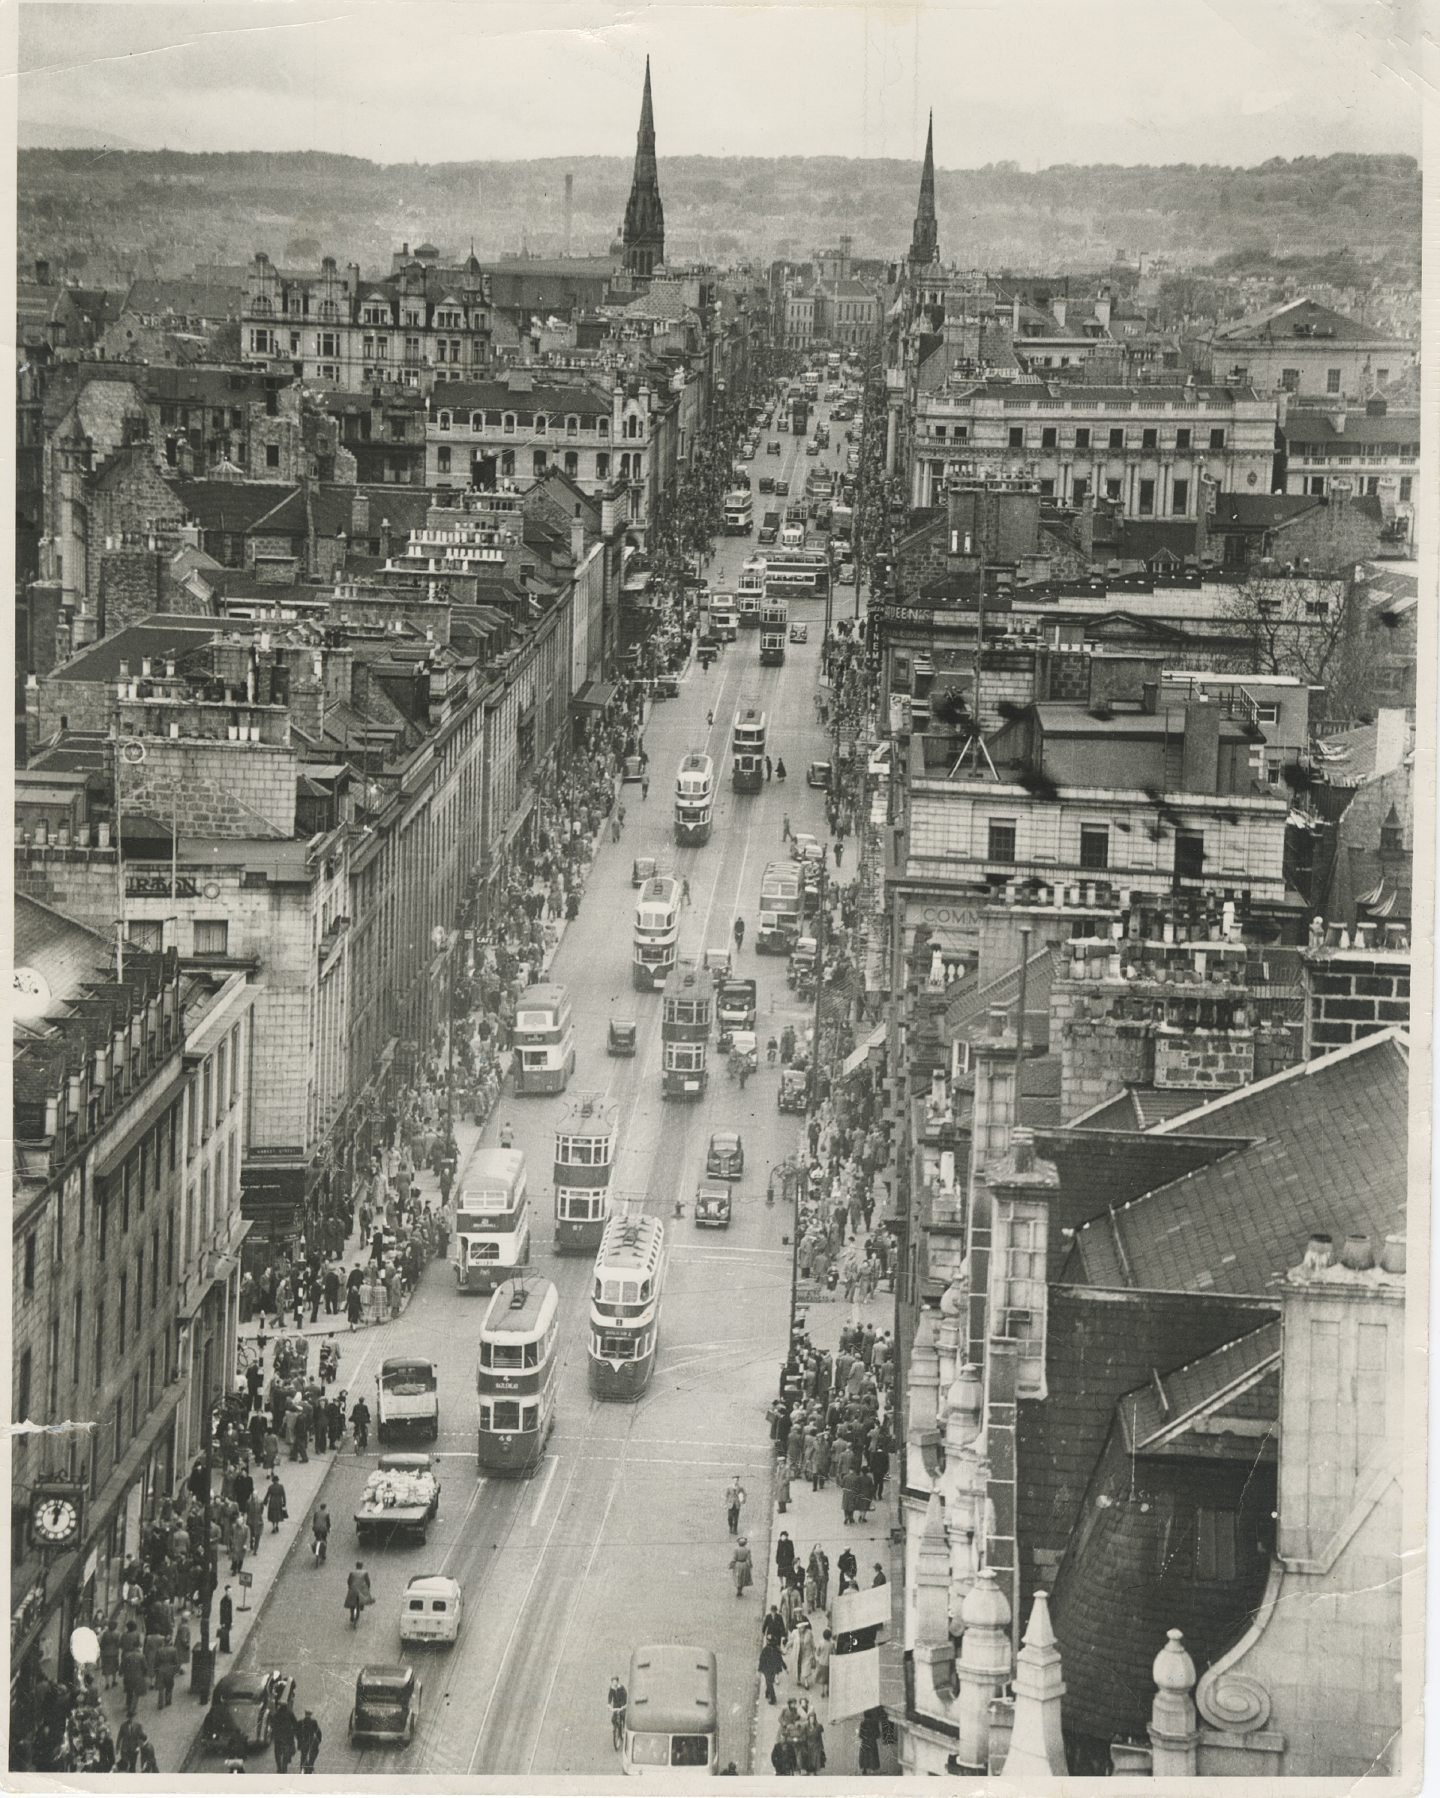
Majestic photos of Aberdeen in its bustling heyday
And elements of these reports are reflected in the photos.
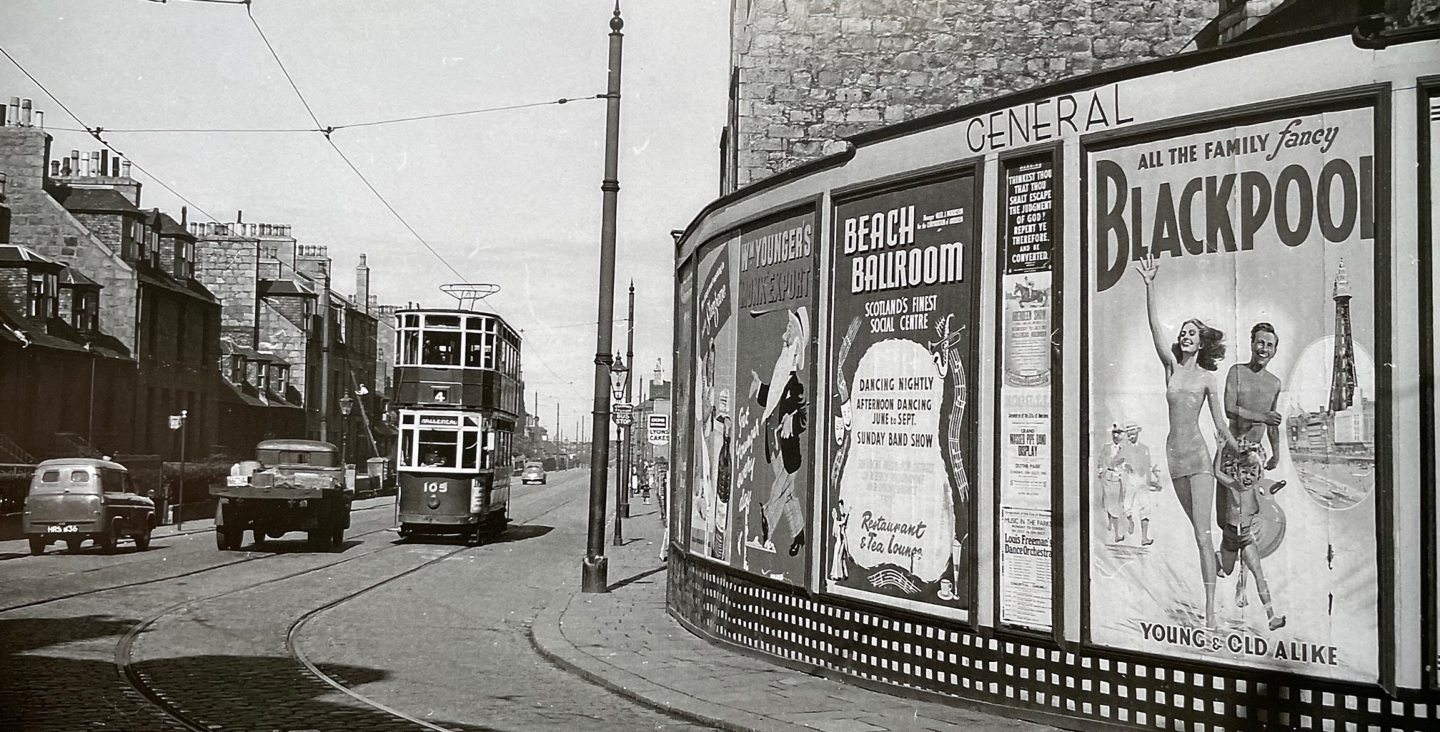
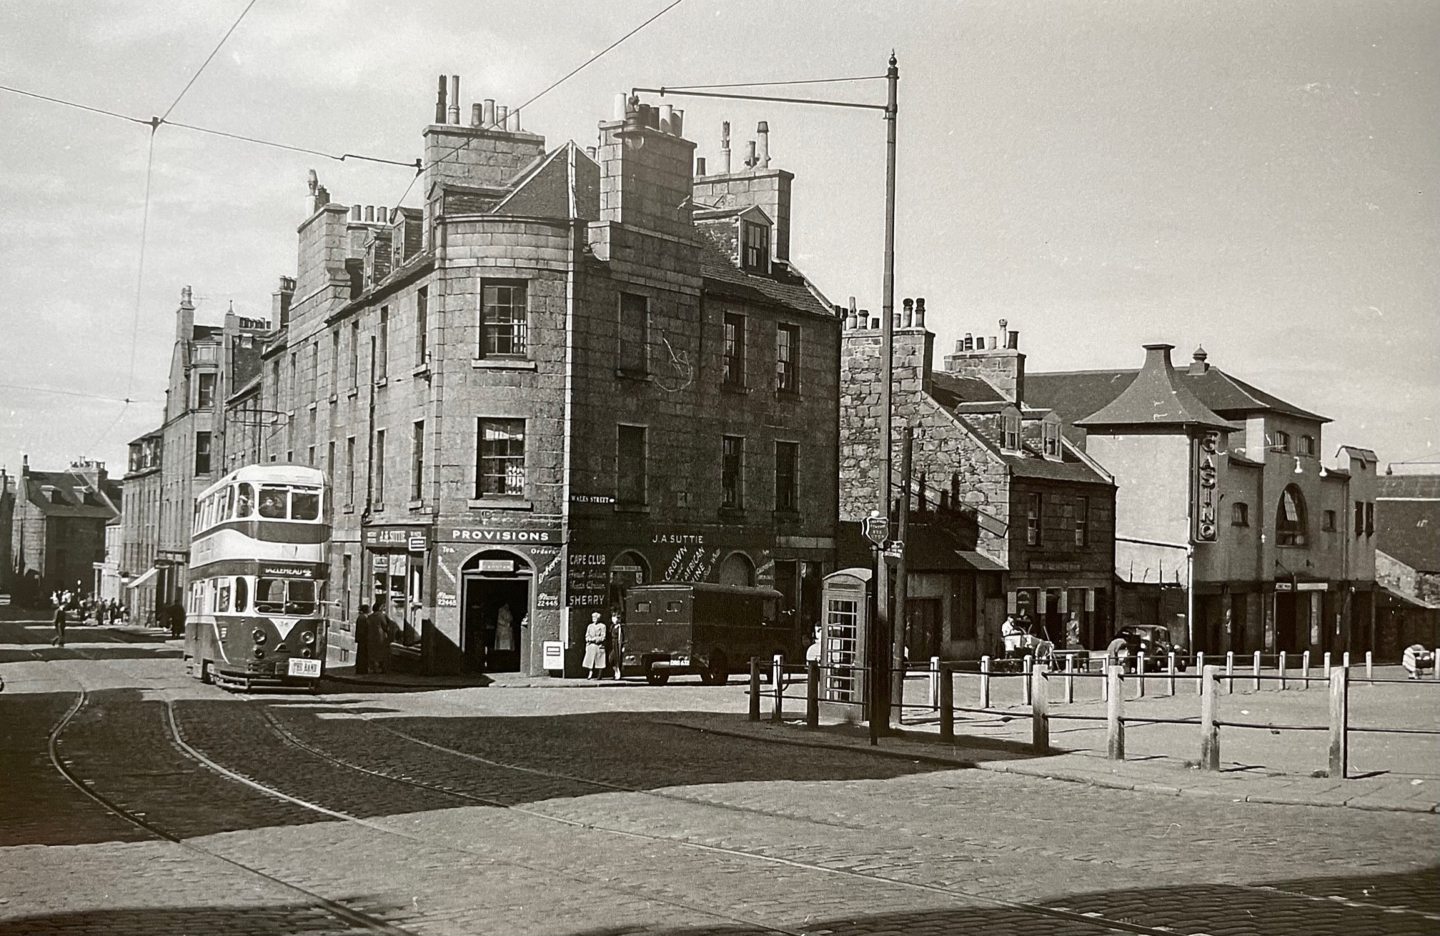
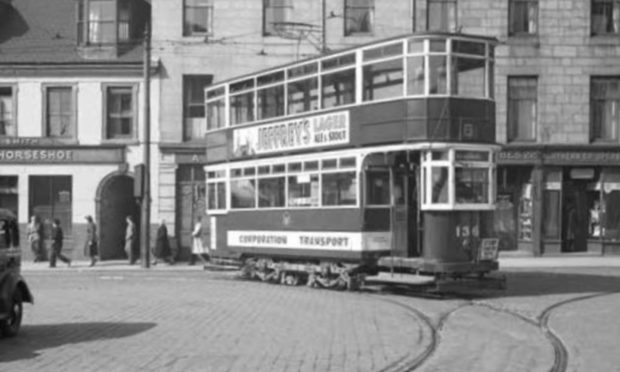
Images of the main thoroughfares show glimpses of bygone shops as trams glide by.

Although not the intended subjects, Holburn Street’s handsome granite buildings with uniform sash and case windows, shops with outstretched awnings, and vast advertising billboards provide a fascinating backdrop in the Clarke brothers’ photos.
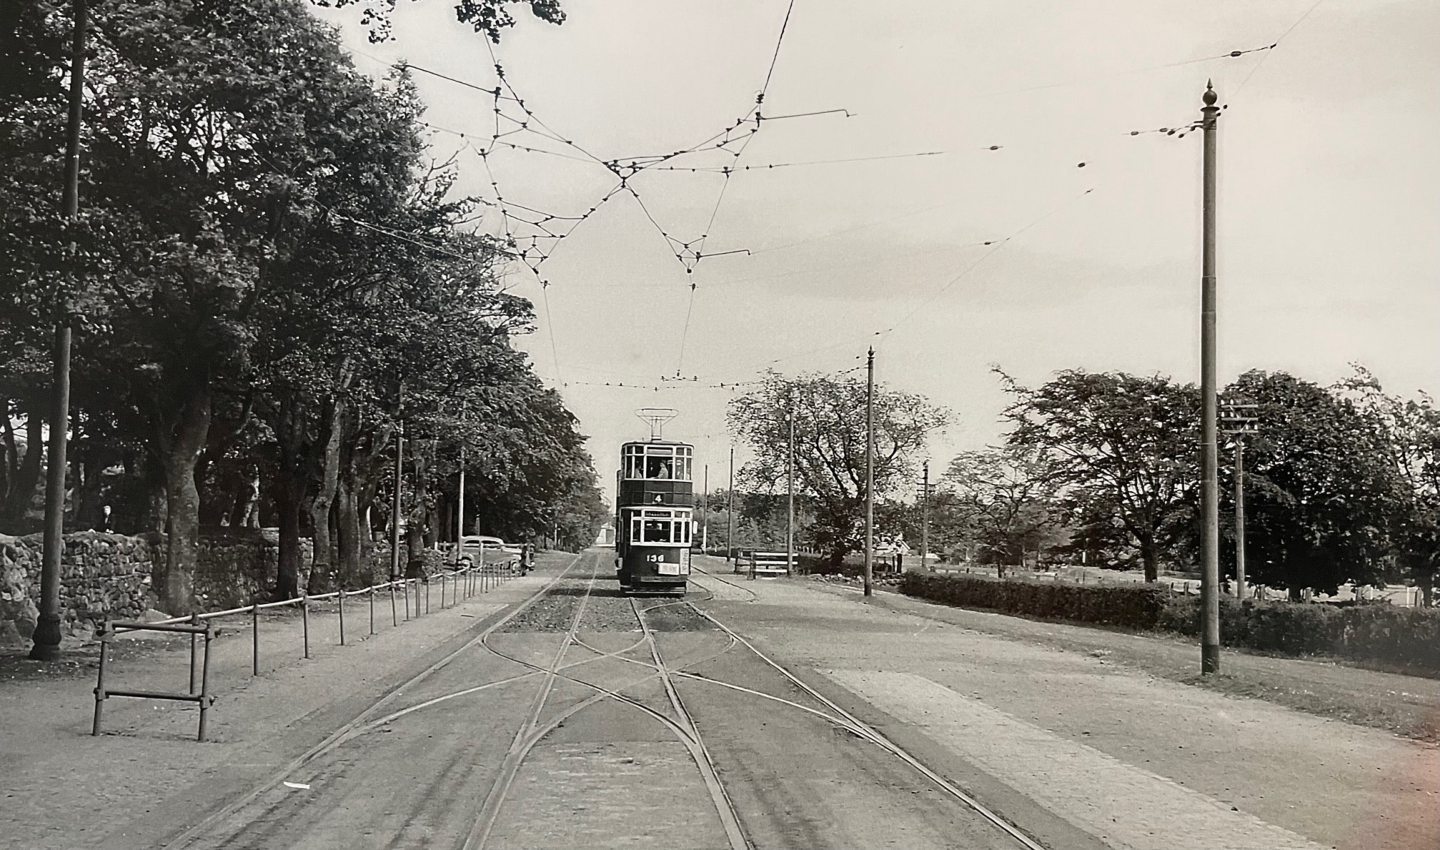
Each of the captions explains the tram’s number, where it was built and what it is doing.
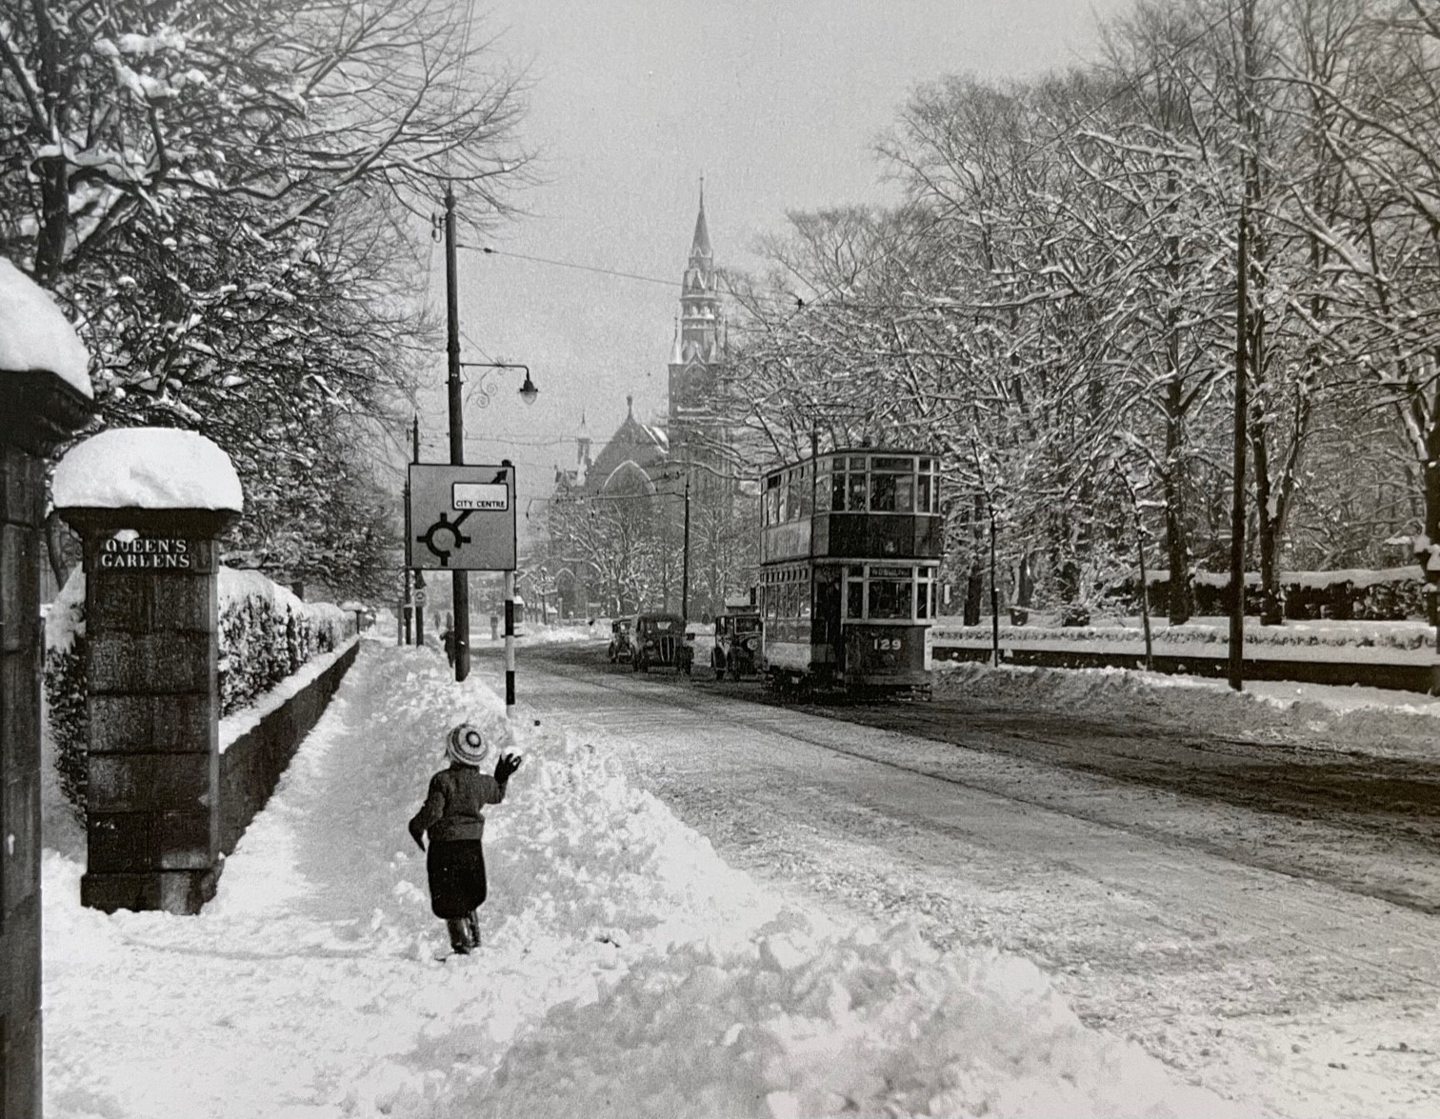
The trams look particularly majestic in photographs showing the well-heeled homes of the city’s West End.
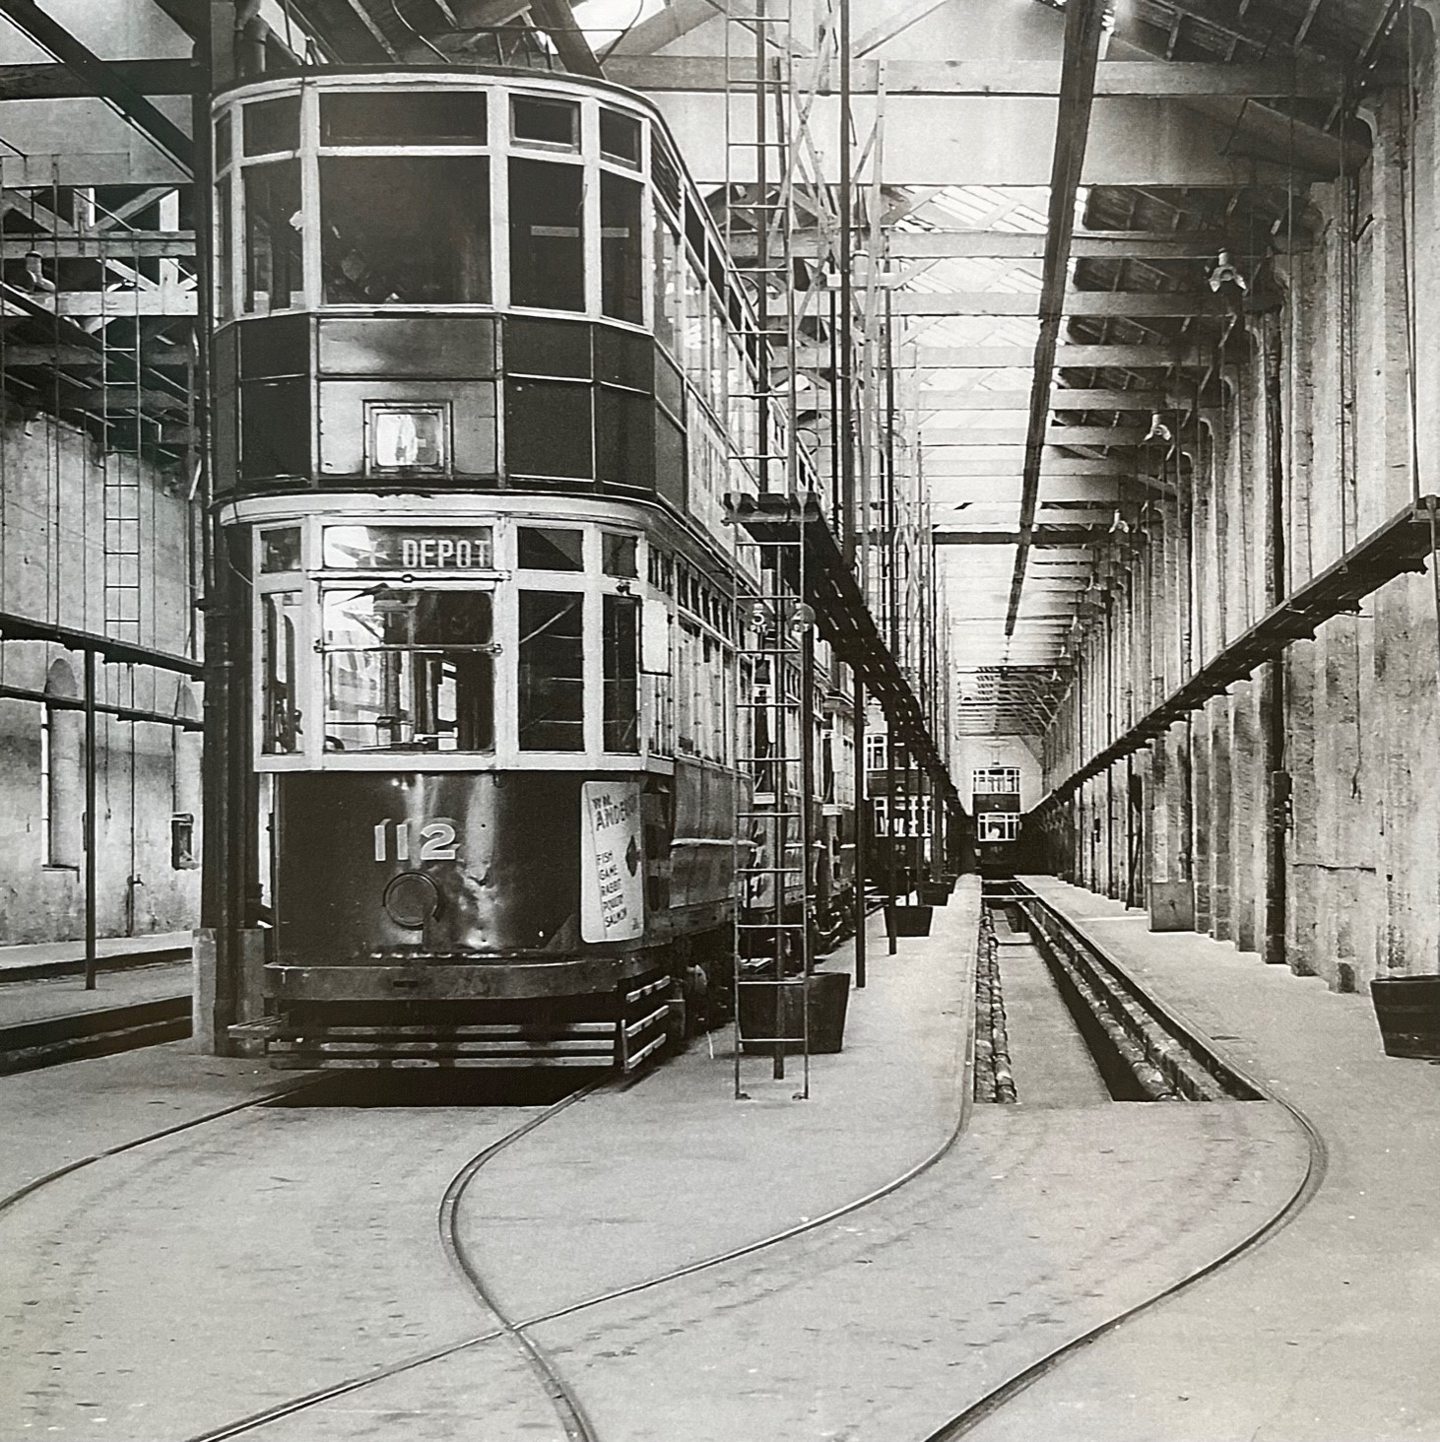
There are also rare glimpses of two salt car trams sitting in the empty depot at Queen’s Cross; they were the last open-balconied trams operated in the UK.
When the Clarkes visited Aberdeen in July, they likely saw the network at its busiest.
The sheepdog trials at Hazlehead on July 9 required an extra 20 trams, and a further 10 went to Sea Beach – the terminus for the beach.
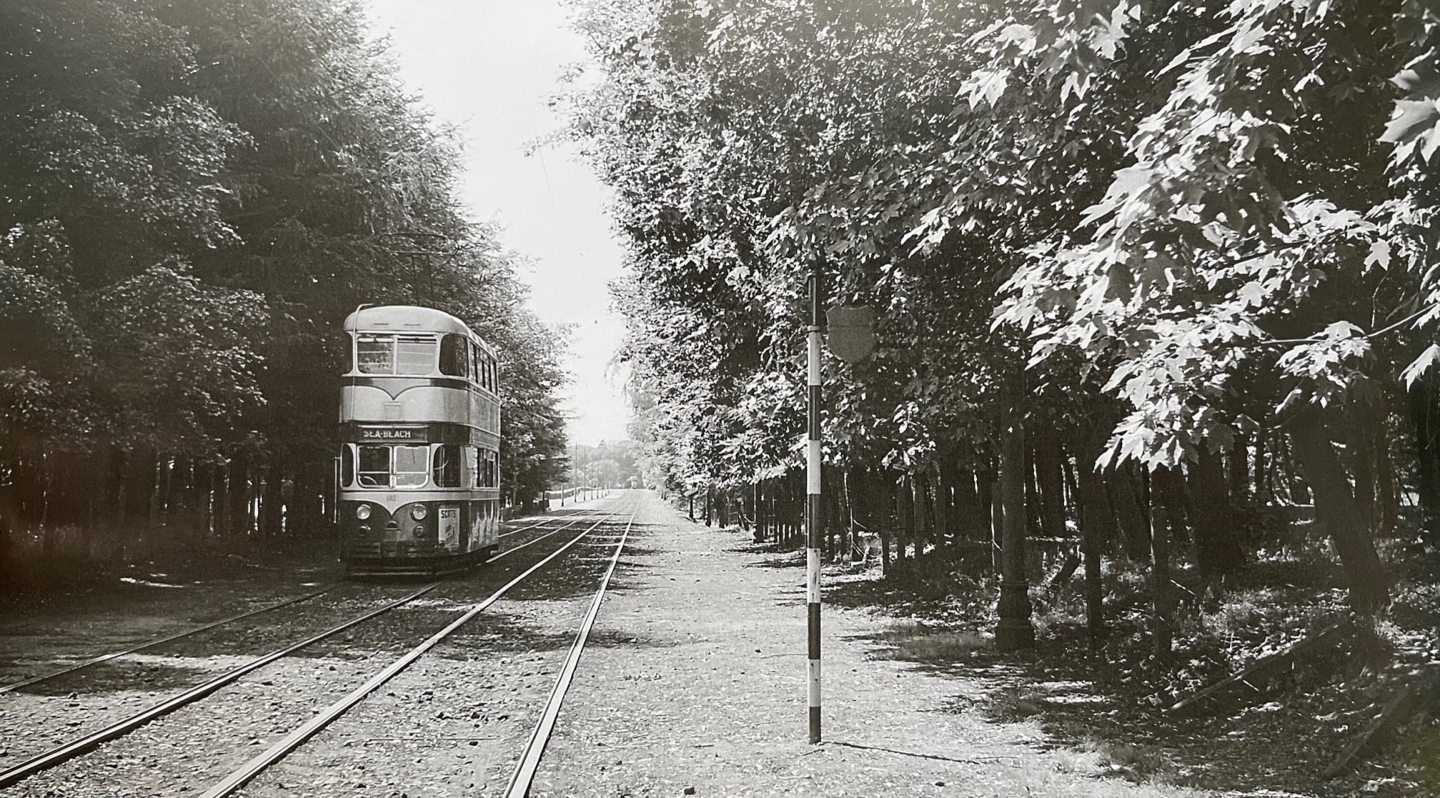
To this day, the small section of track at Sea Beach remains, the only lingering clue that Aberdeen once had a comprehensive tram network.
The Royal Northern Agricultural Show on July 11 saw 25,000 people in attendance requiring 21 extra trams for “heavy and steady” traffic.
And when the circus came to town, sold-out performances meant the corporation laid on extra trams.
‘No final farewell for this service’
As the year wears on, the book notes international events like the Suez Crisis, as well as local ones.
Author Henry writes a short, but significant note for October 2; the last tram ran from Hazlehead at 11.30pm.
He laments: “There was no final farewell for this service.”
And the following month, the last tram ran to Woodend.
The Evening Express reported “hand-straps and electric bulbs were removed by souvenir hunters when the last tramcar on the Woodend route made its sentimental journey through Aberdeen”.
The article said “the tram was filled when it left the Castlegate at 11.30pm for the last trip” on November 17.
But the removal of bulbs interfered with electrics and the tram was “plunged into darkness” for its return journey to Queen’s Cross.
Aberdeen was only left with the Bridges tram route.
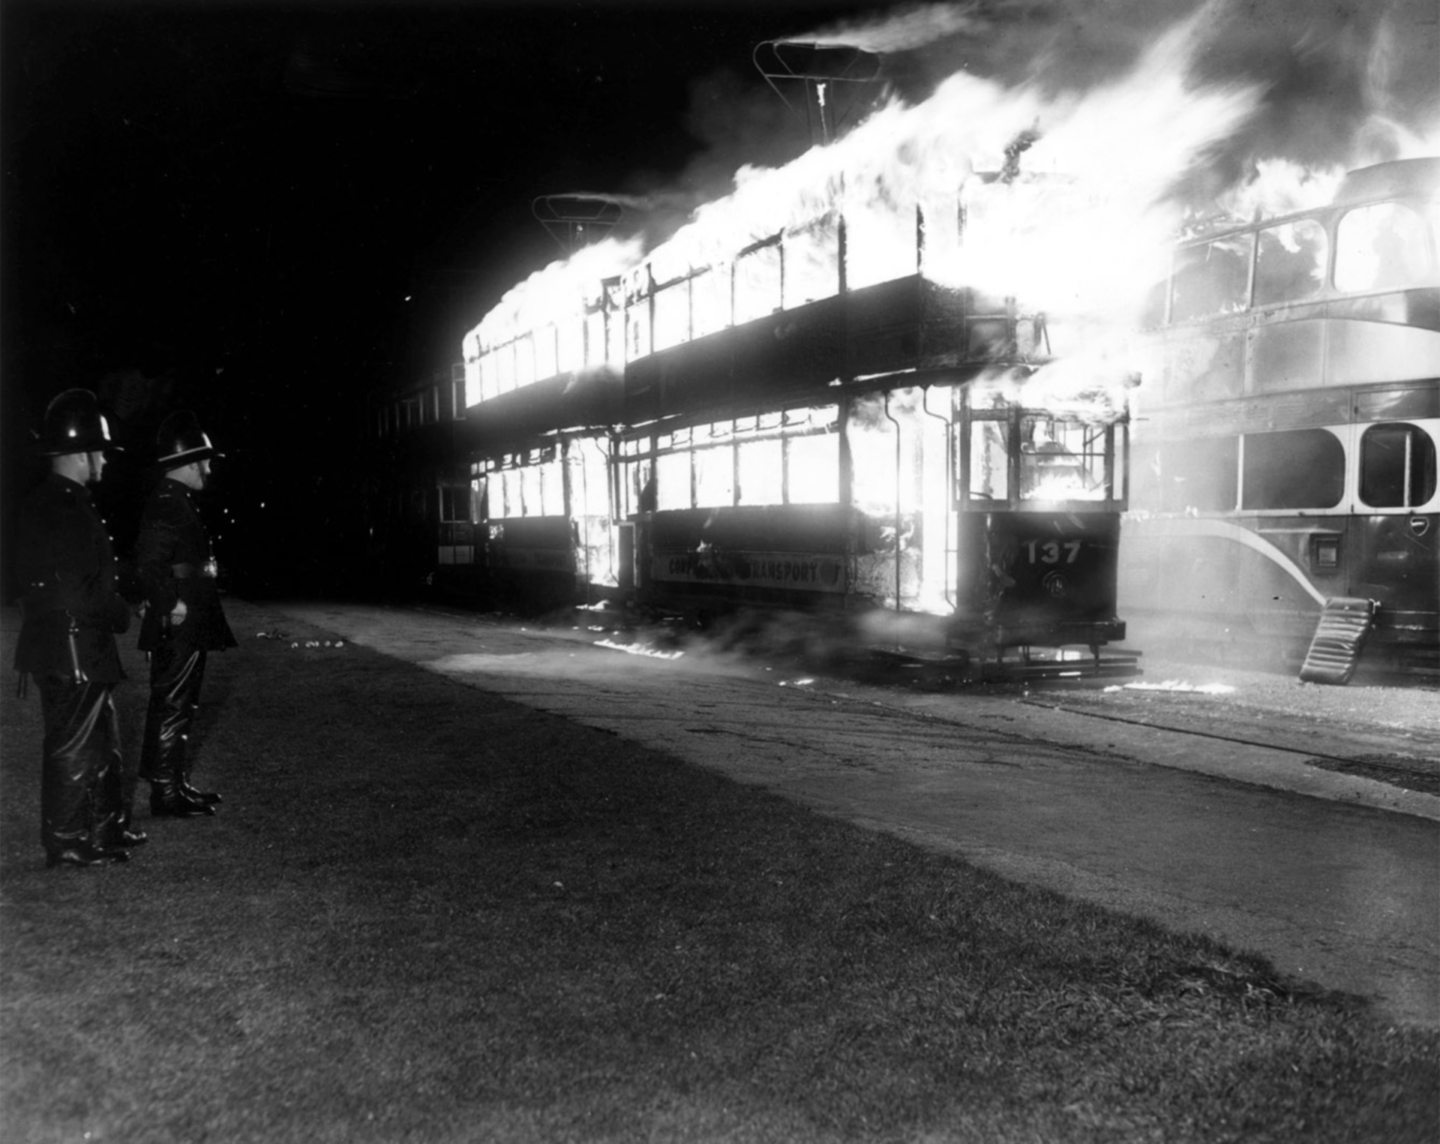
But this would follow a similar fate in 1958, culminating in the barbaric burning of the entire fleet at Aberdeen Beach.
The trams, which had been a mainstay of the city’s economy and enabled the expansion of its housing estates, were no more.
On May 3, Aberdonians thronged to the streets to say farewell to the trams before they went up in smoke.
But a second, secret burning took place on May 16.
The EE reported how no announcement was made that the remaining fleet would be torched.
However, word spread and people “flocked to the scene in their pyjamas, with overcoats on top” to witness the spectacle.

Press cameras clicked, film reels whirred and amateur photographers turned out “to capture a bit of Aberdeen’s history” as the last 18 trams were burned.
The Tramways of Aberdeen 1956 is available from Waterstones, WH Smith and directly from publisher Morton’s Books.


Conversation